Friday, December 22, 2017

Fall Garden updates!

Things have taken off in the garden within the past month or so. We have had tons of zucchini blossoms (some I fried stuffed with Ricotta), a couple handfuls of green beans, and huge collard leaves.


One of my favorite parts of gardening is seeing how each plant grows. For some reason I thought that zucchini plants would grow like cucumbers but instead found that they grow like squash. Some veggies seem to do better in my garden than others. I've found that beans are easy to grow and can be prolific. We love eating sauteed green beans with garlic.


The collards are thriving and require little care. They are also have a little blue tint to them which makes them so pretty in the morning light.

I do however, have a lot of trouble with zucchini and squash. I tend to get lots of flowers but very little fruit and none that reach maturity...yet! Hoping that the few zucchini's I have don't rot.


Any other Fall gardens out there? What is working for you?

Monday, November 6, 2017

Florida Fall Gardening

Fall in Florida must be how the weather in heaven feels. After a very humid and hot summer these small cold fronts are much welcomed. In Florida our growing season can easily be year round since our winters are so mild. This is my first fall garden and is a bit smaller than the spring garden.


I decided to narrow my plants down to 3-4. I have beans growing in the back, then zucchini, and collards in the front. One of the most interesting things I've found about gardening is just seeding how different plants grow. For instance, cucumber and zucchini seem like they would grow similarly, right? Nope, cucumbers vine and zucchini grows in a bush (like squash)!

Everything seems to be growing well and I am waiting on the first blossoms! I think I should have lots of pole beans coming soon. Does anyone else have a fall garden going? Do you can any of your bounty?


Sunday, May 28, 2017

New Beginnings

This year I decided that I would begin my own garden. I knew I wanted to start small and inexpensive. I had so many questions as a new gardener: Will I enjoy tending the garden? Where should I start it? What do I plant? and maybe most of all Will I have TIME?
 

With those questions in mind I spent a month examining our small tree covered property trying to find that special sunny spot. I settled on a brambly weedy area near our front fence. Can I do this? I kept asking myself. Can I actually grow my own food? 

Still unsure of my green thumb I carried on. Amending my soil and tending to my seedlings. I noticed every single change from day to day. I was aware of the moisture, sun, new leaves. I would wake up excited to see if any new seeds have emerged.


Eventually these seeds were ready to be transplanted. Like a mother dropping her child off for school on the first day of kindergarten I reassured my tiny seedlings that this new patch of dirt would be perfect for them. I gave them a nice drenching of water, a sprinkle of fertilizer, and crossed my fingers.

Then, Florida did as Florida does and surprised us with a very frosty night! I was so worried, was all that hard work for nothing? I carefully arranged small containers over the seedlings to keep them warm. I prayed to mother nature to have mercy on my little seedlings.

The following days I carefully monitored the condition of my seedlings. Eventually things warmed up and the seedlings grew. Still nothing to eat but they were growing! I was actually growing cucumbers, tomatoes, beans, squash, peppers, and strawberries. 


Now, as we reach mid-summer I am able to harvest a few veggies almost daily. I am hoping to post weekly garden updates and tips that I find helpful. Maybe a small garden is in your future?


Monday, May 22, 2017

Blueberry picking at Southern Hill Farm

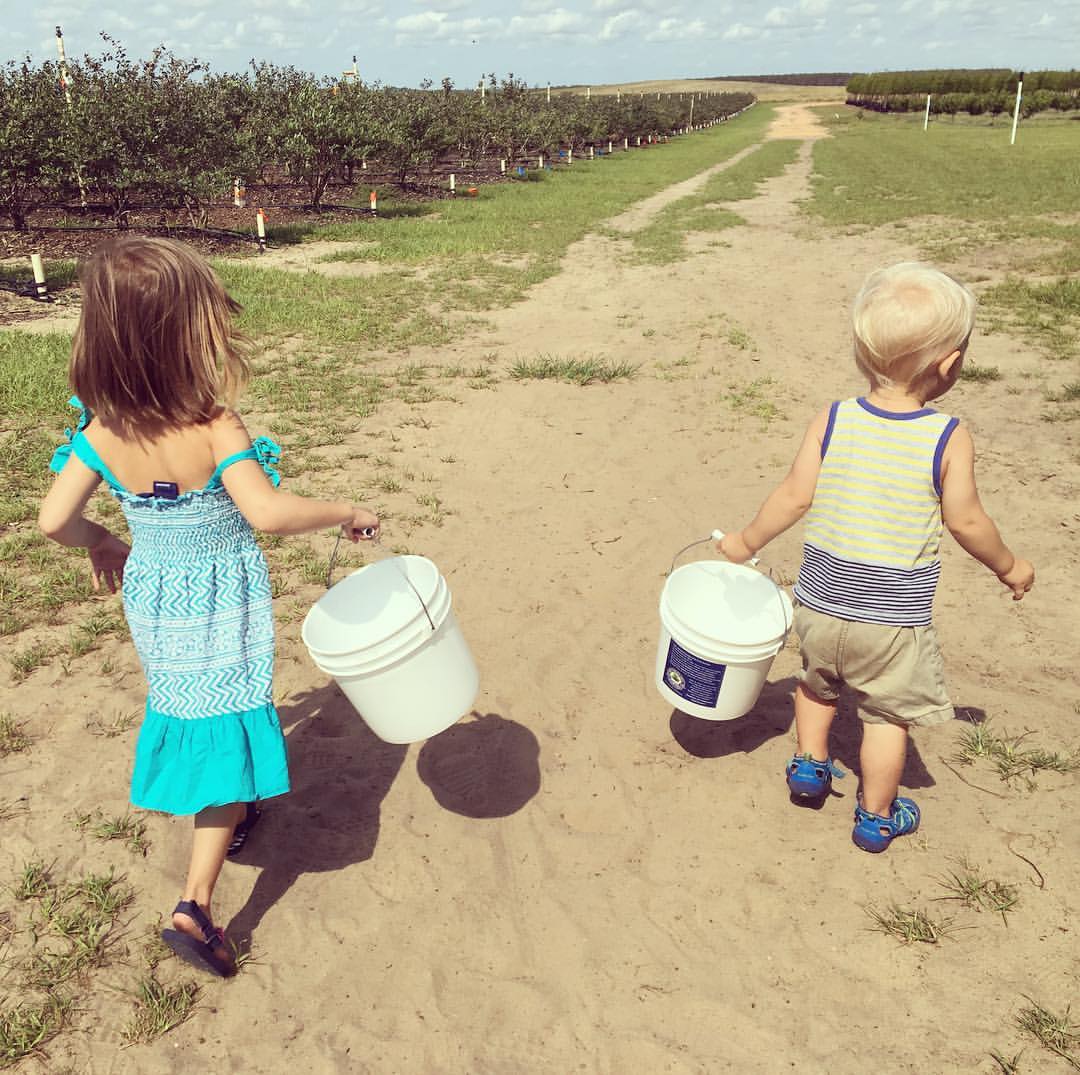
Down a winding dirt road, a stones throw away from the Mouse, hides a real Florida gem. On a warm Florida morning I packed the kids up to meet Granna at Southern Hill Farms for some blueberry picking!

 
I never knew this but there are many varieties of blueberries, some sweeter and some with more of a bite. We took one look at the little map and decided to head towards to the sweet juicy rows of blueberries. 


The kids picked blueberries for about 15 minutes before spotting the play area! Huge tires to dig into, swings, and even checkers! We also enjoyed some thirst-quenching blueberry lemonade at their little store. 


We had picked about a 2 pounds of blueberries, more than enough for a blueberry pie. I used this recipe (and refrigerated pie dough) to make a delightful blueberry pie bursting with flavor. Southern Hills Farm is the perfect place to bring kids for their first trip to a farm! 

Monday, April 24, 2017

From Drab to Fab!

One of my favorite things is finding a piece of furniture that someone is tossing out! I am a known trash collector who enjoys transforming tossed aside pieces into beautiful show stopping works of art.


First I painted the mirror frame teal and them I used a variety of paint markers to create zentangle designs. It was nice to doodle every time I got 15 minutes to myself.


Before hanging outside I sprayed it with a coat of protective spray paint. Pretty sure you can find this clear coat at most craft stores and even home depot.

Tuesday, January 10, 2017

Let's get Rolling!

Tinkerlabs is running a 7 day challenge to get you creating with your kids, or just yourself! This is the 2nd time that we have done the Art Start Challenge and this time I bought the PDF. I highly recommend checking out the website and signing up for emails.

Today we used marbles and a spinning top to paint! I watered down the tempura paint a little bit so the marbles could roll around a little easier. Annabel and I were both surprised to see the neat spray that the spinning top made on the paper. We placed a small sheet of white paper inside of a plastic lid (a pan with big walls would work too). Then Annabel used a spoon to drop paint onto the paper. Lastly we added the marbles and got rolling!

I really like this activity because it works so well with all ages. You can get complicated with colors or just let them mix freely. 


The most popular play-based learning activity!

Water Play!

One of my most successful activities for my preschooler has to be water play. I hosted a 4 week Play-based art group as part of my master's capstone. This activity held all of the children's attention for the majority of the 45 minute class.

The only thing you really need for water play is a large bin or plastic storage box. I used shallow bins from Ikea and placed them on wood crates to elevate them a little bit. I them placed a variety of tools like mesh strainers, spoons, fuzzy balls, sparkles, tissue paper, and paint. The kids loved using the strainerstrainers to get the fuzzy balls. 

Materials:
Large Bin or storage box
Water
Mesh strainers
Spoons
Jars
Tissue Paper
Sparkles
Paint
Pretend flowers

Fill the bin with water either outside or inside with paper or a rug beneath it. I noticed our tile got rather slippery once the kids started splashing around. Then place a small box filled with the tools and mediums. Then sit back and watch the children play and explore. They will quickly find out how strainers work and will enjoy the new colors the water turns.


Saturday, January 7, 2017

Rainy days = Art days

With a cold front, think 50 degree weather, approaching Florida we have been stuck inside today and most likely most of tomorrow. Perfect timing to begin 2 art challenges. One for the kids and one for me. This is my second time doing the ArtStartChallenge with Tinkerlabs and I love the different easy projects she provides. This time I bought the PDF for the week because the last challenge was so great.

Today we explored how paint was absorbed into doilies. Doilies offer a unique shape for kids to play with and tend to let colors spread nicely. My 3 year old daughter really enjoyed mixing the colors together, as usual. 


To complete our project and turn it into "wall art", she painted a small canvas bluish and glued the doilies onto it to make trees!


My Art Challenge begins today and the topic was sun. I took about 15 minutes to do a quick little watercolor of a Sunflower. This challenge lasts for 30 days and has a new topic each day. Simple and therapeutic. I hope everyone is having a cozy and creative day!


Friday, January 6, 2017

Peg family fun

I've always adored the simplicity of wooden peg people. They really are a blank slate that a child can customize in so many ways. One morning I quickly cut up some fabric scrapes and yarn, then put out a variety of bottle caps and buttons. Then the fashion designer came to the rescue to cloth these poor peg people.


Materials
Peg people (I bought mine on Amazon).
Fabric Scrapes
Yarn
Bottle Caps
Buttons
Markets
Glue (stick or school glue)

After you set out the materials let your children explore and create their own ideas. I often find that my 3 year old has lots of ideas but has difficulty making them "come to life". I helped a bit with the gluing and cutting. Aside from that, Annabel was involved in this activity for about 30 minutes.

Will you wrap fabric for dresses? Make belts of yarn? Maybe your peg person has a button hat? There are so many ideas! Let's see YOUR peg people!

Thursday, January 5, 2017

Mommy and Me Art

After the holidays I found myself swimming in tissue and wrapping paper. Instead of tossing it out we decided to paint on it. Annabel, like most kids her age, loves free painting. The tissue paper gives interesting texture and the colors blend together easily.

Materials:
Tissue Paper
Watercolor Paint
Brushes
Elmers Glue
Small canvas or thick paper

Step 1: Paint your tissue paper. Cool colors for the ocean? Warm colors for the sun? Maybe some greens and yellows for a forest? Let your tissue paper dry for a few hours or overnight.

Step 2: Shred it up! Tear your tissue paper into small prices.

Step 3: Arrange it. Decide what kind of design you will be making. Lay out your tissue paper.

Step 4: Glue it down. Mix 1 part glue to 1 part water (Glue water) and use this to adhere the tissue paper to canvas. Let it dry and you have a little masterpiece!


Saturday, April 25, 2015

Easy Masking Tape Art with my 2 year old!

I have been really wanting to do an abstract art piece with my 2 year old and I have found the perfect way to achieve a clean unmuddy look; MASKING TAPE! It is so simple and the sky is the limit with the designs you choose to mask out.

I choose a simple herringbone design and set to work placing the masking tape down. This part took about 20 minutes and was kind of tedious.


Next you need to chose 3-5 different colors of acrylic paint. I choose cool colors and a bright pop of yellow. WARNING: Acrylic stains, so cover the area with paper towels and have wet wipes ready! I chose acrylic because you don't have to worry about the paint flaking off later on and it looks a little more professional.


I then dabbed the colors randomly over the canvas, handed my daughter the paintbrush and let her go to town. After about 5 minutes she was done.


I then let the painting dry but before I removed the masking tape I chose a few rectangles to add gold accents. Easy Peasy! Then you remove the masking tape and Ta-Da, "Toddler-Made Art"!


A little bleeding when viewed up close, so next time I might chose a differnt painters tape:-)


Thursday, April 16, 2015

Hexipuff Mania!

If you knit you have probably heard of the famed Beekeepers quilt created by Tiny Owl Knits. This whimsical quilt is created by knitting many (MANY) smaller units, called Hexipuffs, together. The result is a gorgeous patchwork of multicolored yarn that provides tons of warmth.

Living in Southern California we don't really need warm blankets/mittens/scarves because it doesn't get that cold. So I decided to use the Hexipuffs to create a nice cushion for my Rocking Chair. Which is awesome because I only need to knit 30-35!

Here are a few I have already knitted up. I've been using Paton's Kroy Sock Yarn in Meadow and so far I adore the bright happy colors!


This really is a great knit for those who need something small that they can just pick up and work on for a few minutes at a time! Plus there are SO many cute designs and pattern you can knit into them! I'm thinking of adding some cute little hearts myself. Happy Knitting!

Thursday, January 1, 2015

Dyeing Yarn with stuff you find in your supermarket!


I had this idea to create a blanket that had 3 panels (which were actually just 3 garter stitch scarves) that were stitched together to form 1 blanket. The border of the blanket was left white (the original color of the wool).

1. Get your wool! The yarn must be WOOL for dying (or at least wool absorbs the color best). Your yarn will NOT absorb as much color if you use an acrylic blend. I have always been found of Patons. It can be found at most major craft stores and the price is right (in case you make a happy accident).


2. Get your dyes and mordants! Now this is the fun part. I went to 3 ethnic stores to find my dyes, an Indian, Mexican, and Japanese. I found 5 different fruits/veggies/spices that I thought could be made into a dye. Tumeric and the Cactus Fruit gave the best colors by far!


Mordants are needed to join the fiber with the dye. If you don't use a mordant your dye can wash out. I used Alum and Cream of Tartar which can both be bought in the spice aisle of most super markets, you can also buy more specialized mordants on amazon. You can reference the EarthGuild for more information on different Mordants.


I would actually love to use dyes found in my environment. I live in a desert-like climate in Socal so that could be really interesting! I just got this book which gives awesome plants/berries to use! Here is one of my new favorite natural dyeing books Harvesting Color!

3. Now you need to make a decision here. Do you want to dye the whole piece of fabric already knitted? OR do you want to dye the yarn and THEN knit it?


I think if you dye the fabric already knitted (like I did) you risk some areas not absorbing the color as much because of parts of the yarn not being exposed to the mordant and dye. However I really wanted to achieve a gradient of color by dipping the different parts of the fabric in the dye. This I think would be much more difficult to do if the yarn was not preknitted.

4. Before you dye the wool you must prepare it using the Mordant. Pre-soak your yarn for 1 hour. In a large seperate pot combine the proper amount of Alum and Cream of Tartar, boil and gently place yarn of fabric into the pot. I did this for about 1 hour. Do NOT swish or agitate the yarn or it will start to felt.


5. NOW for the COLOR! Your yarn is ready! Are you? Get your ingredients together and prepare to make them into gooey ooey mushes! I used a mortar and pestle to help along the way. I would smash until I started to get some good juice going, making it as concentrated as possible. Then I would put the mush through a mesh sieve and put the liquid into a small pot. Then I added as little water as possible to dye the amount of yarn I needed. I wanted the color to be concentrated. Below is Chili Peppers! SPICY!


6. Leave the yarn in the DYE for 30 minutes, the longer the better! Then take out and dry in a shady but warm area.

Well those are the notes I have for now! I am hoping to try some new dying techniques soon. I hope you'll give it a shot and if you have any questions just leave a comment or send a message! You can DYE it!


Tuesday, December 30, 2014

From Goodwill Nightstand to Play Kitchen!


This year my daughter's big present from me and her Dadda was a little play kitchen. I had seen a few tutorials and examples on the interent and gathered all the ideas I liked. The harderst part was actually finding a nightstand to use. I checked craigslist but they were usually too expensive. It was when I went to the nearby Goodwill that I found this charmer for 9.99!


Unfortunately the nightstand was too tall for my little girl so we used a jig-saw to cut the top drawer off the table and then reattached the top to the base. Now it is a much better height for the little gal!


The next step was to sand and prime to wood. I used which seems to have worked well so far!


Please forgive me because the last few weeks were kind of crazy so there aren't as many photogrpahs but I will explain everything the best I can. So after priming I taped off the different sections and started with the final matte coats using Behr Premium Plus in Island Oasis and in......


The fun part was adding the fixtures! We used old CD's spraypainted black for the burners (with a matte top coat for protection), a small stainless steel bowl for the sink, a PVC attachment for the faucet, and drawer knobs for the burner dials. I also bought a white magnetic board for the side of the play kitchen, timer, magnets, a push light for the inside oven, and a few pots and pans. These items are best bought at Dollar Stores or my nearby Daiso store. 

The majority of the foods were knitted by me! There are tons of knitted playfood patterns I found at KnittingPatternCentral.


To make the oven door we dettached the drawer front and then cut a square hole. The we used a small piece of plexiglass on the back of the new oven door. To make the cute look more even I added white trim around the edge made of balsa wood. We used to original drawer handle for the oven handle becasue I liked how vintagy it looked. The oven door gave us a bit of trouble the night before christmas because the hinges were not lining up right.  In the bottom picture the oven light is on abd you can see the veggies "cooking".


So hopefully this gives other a few ideas of how to make their own play kitchen! It was a great learning expereince for us and I am excited to see what my daughter cooks up. If you have any questions at all just leave a comment and I'll get back to you!

Tuesday, December 2, 2014

Jazzing up those Jars

Let's face it, Mason Jars are very durable but a little utilitarian. So for the holidays I began brainstorming SIMPLE ways to dress up the lids of the Mason Jars. Make sure you also include the date of when you canned it on the lid or sticker!


1. Use old Christmas cards! I hate throwing away cards so I have a few really big boxes of old birthday, christmas, and whatever other holiday card.


2. Trader Joes Shopping bags! Have you ever looked at the incredibly cute vintage designs on their bags? Perfect for a lid topper!

3. Wrapping paper! Buy discount wrapping paper from dollar tree and go to town.

4. Scrapbook paper! Find some paper with a snazzy holiday design to jazz up your jars!