Tuesday, December 30, 2014

From Goodwill Nightstand to Play Kitchen!


This year my daughter's big present from me and her Dadda was a little play kitchen. I had seen a few tutorials and examples on the interent and gathered all the ideas I liked. The harderst part was actually finding a nightstand to use. I checked craigslist but they were usually too expensive. It was when I went to the nearby Goodwill that I found this charmer for 9.99!


Unfortunately the nightstand was too tall for my little girl so we used a jig-saw to cut the top drawer off the table and then reattached the top to the base. Now it is a much better height for the little gal!


The next step was to sand and prime to wood. I used which seems to have worked well so far!


Please forgive me because the last few weeks were kind of crazy so there aren't as many photogrpahs but I will explain everything the best I can. So after priming I taped off the different sections and started with the final matte coats using Behr Premium Plus in Island Oasis and in......


The fun part was adding the fixtures! We used old CD's spraypainted black for the burners (with a matte top coat for protection), a small stainless steel bowl for the sink, a PVC attachment for the faucet, and drawer knobs for the burner dials. I also bought a white magnetic board for the side of the play kitchen, timer, magnets, a push light for the inside oven, and a few pots and pans. These items are best bought at Dollar Stores or my nearby Daiso store. 

The majority of the foods were knitted by me! There are tons of knitted playfood patterns I found at KnittingPatternCentral.


To make the oven door we dettached the drawer front and then cut a square hole. The we used a small piece of plexiglass on the back of the new oven door. To make the cute look more even I added white trim around the edge made of balsa wood. We used to original drawer handle for the oven handle becasue I liked how vintagy it looked. The oven door gave us a bit of trouble the night before christmas because the hinges were not lining up right.  In the bottom picture the oven light is on abd you can see the veggies "cooking".


So hopefully this gives other a few ideas of how to make their own play kitchen! It was a great learning expereince for us and I am excited to see what my daughter cooks up. If you have any questions at all just leave a comment and I'll get back to you!

Tuesday, December 2, 2014

Jazzing up those Jars

Let's face it, Mason Jars are very durable but a little utilitarian. So for the holidays I began brainstorming SIMPLE ways to dress up the lids of the Mason Jars. Make sure you also include the date of when you canned it on the lid or sticker!


1. Use old Christmas cards! I hate throwing away cards so I have a few really big boxes of old birthday, christmas, and whatever other holiday card.


2. Trader Joes Shopping bags! Have you ever looked at the incredibly cute vintage designs on their bags? Perfect for a lid topper!

3. Wrapping paper! Buy discount wrapping paper from dollar tree and go to town.

4. Scrapbook paper! Find some paper with a snazzy holiday design to jazz up your jars!


Friday, November 28, 2014

Knitted playfood for Annabel!


A few months ago I thought it would be fun to knit my daughter some playfood for Christmas. I was a bit worried about working with DPNs again (the octopus wrangle) but I actually really enjoyed knitting these little projects. It's nice to be able to finish a project every week and let's be honest, she is going to get a lot more use out of these than a sweater in Socal!

I still want to knit her some strawberries, apple, banana, and a fish. Does anyone know of a good fish pattern? 


So I thought I'd link you to the free patterns available on Ravelry! 

Donut: loved this pattern and it gives you do many opportunities to jazz it up with different colored frosting sprinkle beads, or even embroidery sprinkles!


Ice Cream: so many options here! Waffle cone or pointed? Swirled or scooped? 


Squash: gotta have some veggies!

Celery: creative way to use the natural curl of stokinette!


Mushroom: a really quick knit! You could also embroider some spots on the cap!

TIPS!

All of the playfood was knitted on size 4 Bamboo DPNs. I think wood needles are the best for very tiny intricate projects since they "grip" the stitches better. Aluminum needles are just so slippery!

I use Knit Picks Wool of the Andes (worsted) for most of the food. They have a wide variety of colors to choose from and I just love the consistency of their yarn.

I use polyfill stuffing which is washable! When stuffing take lots of little fluffy clumps and pack in tight!


Monday, November 24, 2014

Cran-Apple Butter for the Holidays!

It's that time of the year where many are whipping up delicious delicacies in their warm cozy homes in hopes of sharing them with sweet friends and family. I've always been a sucker for homemade gifts, edible ones even more so!

The wonderful thing about this recipe, and like many other fruit butters as well, is that it can be made in a crock pot leaving you time to tidy the house, wrap gifts, or knock back a few glasses of Pino Grigio. What you do with those extras hours of free time is up to you!

Now this Cranberry Apple Butter pulls double duty in my book. It's savory enough to be used with meats (turkey, pork, or chicken) yet sweet enough to be plopped atop an english muffin slathered in buttah.

Also! In the past 3 weeks I have had 3 different kinds of Holiday sandwiches at Publix, Earl of Sandwich, and Trader Joes! Don't judge I was on vacation. Have you heard about Holiday Sandwiches?! No? Well allow me to elaborate. Holiday sandwiches feature ingredients usually leftover from epic Turkey Day feasts. They may sounds something like this: thick sliced turkey, apple and sage stuffing, with swiss cheese, mayonnaise, and cranberry sauce piled onto hearthy whole wheat bread.


I promise there are cranberries under all those apples.


Aha! See there they are! This is what your Cran-Apple Butter will look like after 15-20 minutes. 
You may even hear the little cranberries popping! Give the pot a good stir every few minutes to prevent any fruit from scorching. 


At the end of the 45 minute cooking time you will end up with a blushed colored mush of cranberries and apples. Mmmm.....Brains! 


Now I moved my crockpot bowl right next to the stovetop so I could easily transfer the mush into the mesh sieve. For me this was the most time consuming part of the recipe since it required mashing everything through the sieve. But that silky smooth fruit butter is worth it!


Mash em, boil em, stick em in a stew!


This is what you fruit butter should look like (like the pink slime from Ghostbusters).


Once the Cran-Apple Butter is done thickening in the crock-pot you can ladel it into jars and process in a boiling water bath for 20 minutes.


 Recipe: Cran-Apple Butter
Adapted from Aimee Wimbush-Bourque from Eatingrules.com

5 lbs of Fuji apples (cored and halved)
1 1/2 lbs of cranberries (I used Trader Joes)
1 cup of maple syrup
1 1/2 cups of apple cider
1 TBS of Saigon Cinnamon

Combine cored and halved apples and cranberries into a large pot. Add the 1 1/2 cups of apple cider and bring the heat up to medium. Stir the mixture every few minutes to distrubute heat and prevent scorching. After 15-20 minutes everything should start looking more mushy and you will notice a lot of liquid is now in the pot.

At this point turn the heat to medium-low and cover for 45 minutes. Give the pot a good stir every 5-10 minutes. Once everything looks like a big gooey mess you will mush it through the seive into your crock pot.

Now that you have a smooth velvety cran-apple butter in your crockpot you can add your sweetners. I think pure maple syrup adds a really warm flavor but you can also use honey. Add cinnamon. Stir well and set crockpot to low. Let sit for 4 hours. For the final hour prop lid open to allow butter to thicken.

While the cran-apple butter is cooking it is a good idea to prepare your jars by sanatizing them in a boiling water bath. The same bath with which you will process your jars for 20 minutes after being filled.

Finally fill your jars to 1/4 inch below rim, place lid on and tighten the ring. Place all jars back into the water-bath and bring water back to boiling. Once water is boiling you can start your 20 minute timer. After 20 minutes remove your jars and listen for those sweet little pings of delight! Bam, done!


Tuesday, September 2, 2014

Pear Vanilla Jam and Drought Conditions in California


As Fall slowly starts to change the air from humid and sticky to brisk and cool I can't help but think about all of the boutiful fruits that are being carefully preserved for the upcoming winter. I feel like canning has made me much more in tune with nature around me and aware of my environment.

As many in the U.S. know, California is in a critical state of drought. I beleive it is the worst it has been since the 1960's. A few months ago when we drove through the heartland of CA we noticed numerous signs in front of farms calling for water conservation. Now I don't live on a farm but I do like to buy direct from farmers and when that produce is in their peak so hearing so much about the drought worries me.

Now on to the Canning! I am going to kick this season off with one of my all time favorites Pear Vanilla Jam! I made this years ago when I first got into canning yet I never blogged it! It is one of those recipes that you can easily fall in love with and eat over and over.

Pears start to come into season in late Summer and last until January. I usually like my pears to be very firm otherwize the consistency can be a little grainy.


Pear Vanilla Jam
(Adapted from Food in Jars)

8 cups of pears (coarsly chopped). I used Bosc.
1 TSP high quality vanilla extract
1 TSP cinnamon
4 cups of sugar
1 package of liquid pectin. I use Ball
1/4 cup of water

Fill you canning pot with hot water. Place jars inside pot and sanitize on another burner. Combine chopped pears, sugar, cinnamon, vanilla extract and water into a large wide bottomed pot. Cook over medium heat until pear soften. Now grab your potato masher and take out some frustration on those pears. Mash em up!


Now add 1 package of Ball liquid pectin. Stir well and bring to a boil.

Now take a little water from your canning pot and put in bowl with the lids. You don't want to boil the lids with the jars because the wax seal will be useless. Just sanitize the lids in a bowl with a little boiling water.


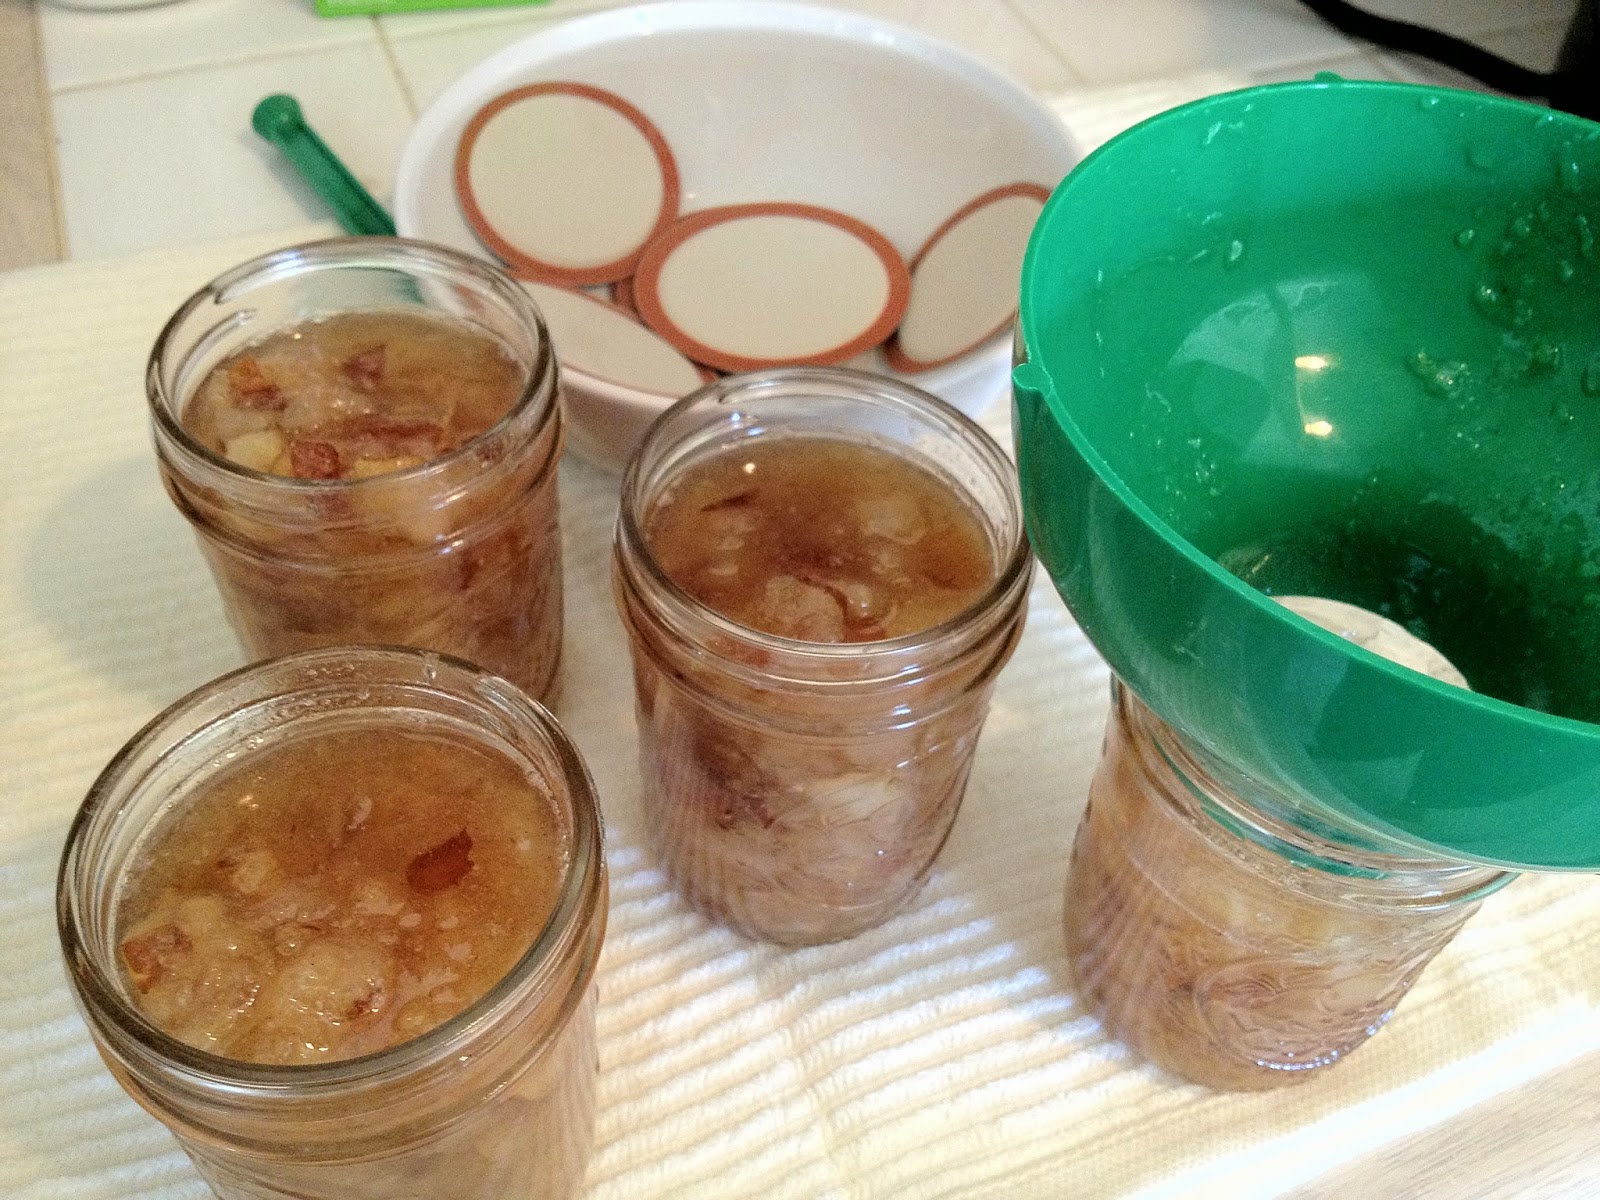
Now remove the empty sanitized jars from the canning pot. Then ladle the Pear Vamilla Jam into the jars using a funnel. Look out for air bubbles and wipe the rims! Place lid on top, screw on the ring, and transfer back into the canning pot.


Return the canning pot to a rolling boil and then start timer for 10 minutes. After 10 minutes remove the jars and place on a nice soft towel to cool off! You should start hearing those glourious pings soon!

I love to eat this spooned onto vanilla ice cream or yogurt. As always if you have any questions just comment below and happy canning!


Monday, September 1, 2014

American Pie


The 4th of July was nearly 2 months ago but I still want to share this adorable pie I made to celebrate the birth of our nation! I was smitten by the pie that Casey Leigh posted on her blog and thought I'd try my hand at it as well.

The recipe is a simple combination of fresh and canned cherries and blueberries. The canned berries have that sweet sugury syrup so you don't have to add any more sugar. You could use a pre-made pie-crust to save on time or easily make your own.

Pie Crust:

1 1/4 cups all-purpose flour
 1/4 teaspoon salt
 1/2 cup butter, chilled and diced
 1/4 cup ice water

Pie-Filling:

1 can of cherry pie filling
1/2 can of blueberry pie filling
1/2 cup of blueberries
2 cups of pitted cherries halved

Make pie-crust by combining the flour and salt. Then cut in the butter until the dough resembles crumbs. I like to use my hands for this and smoosh it real good! Next add the water a little at a time until the dough forms a nice smooth ball. Seperate into 2 balls. Refrigerate for a least 1 hour.

While pie crust is in refrigerator make the cherry filling by combining the 1 can of cherry pie filling and 2 cups of fresh cherries. Do the same with the 1/2 can of blueberries and fresh blueberries. The pie-filling acts as the syrup which make the fruit filling thick and sweet.

Now take the pie crust balls out of the fridge. Butter your pie plate. Lay some saran wrap out over your counter and roll/smoosh out the ball to form a nice circular shape that is a little bit larger than the pie plate. I usually just use my hands for this. Now use the saran wrap to lift your crust up and flip into the pie plate. Easy Peasy!

Now roll out the 2nd ball of dough to make another circular shapes and cut out the stripes. Then cut out a few little stars. Arrange stripes to form the flag and add the little stars! And there ya have it, a real "American Pie".

With lots of other holidays coming up it has me thinking of other ways I can "decorate" pies. Maybe a pumpkin pie with a ghost? A turkey with beautiful feathers? The sky is the limit with pie dough!