I am going to revamp the blog to include a few other topics other then just canning, but I will still can! I'll be canning quite a bit over the next couple weeks to have some yummy homemade preserves for friends and family:-)

Sunday, November 18, 2012
Big update coming, till then a video!
I found this fantastic video about a family that has an urban homestead in Southern California! I think this is something we should all try to do, even if you start small! I had a lovely herb garden going this summer and used the basil regularly in our food! Enjoy!
I am going to revamp the blog to include a few other topics other then just canning, but I will still can! I'll be canning quite a bit over the next couple weeks to have some yummy homemade preserves for friends and family:-)
I am going to revamp the blog to include a few other topics other then just canning, but I will still can! I'll be canning quite a bit over the next couple weeks to have some yummy homemade preserves for friends and family:-)
Saturday, September 8, 2012
#12 Apple Butter of my Eye
YOU NEED:
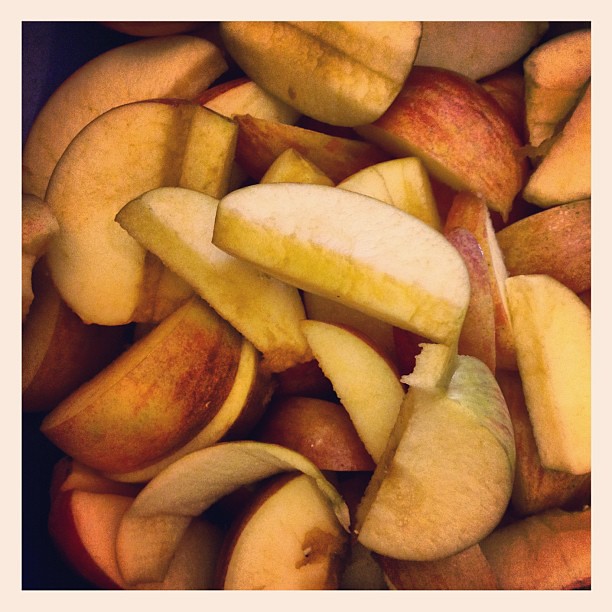
4 lbs of apples, peeled, cored, and diced
1 cup of white sugar
1 cup of brown sugar
Juice from 1 lemon
1 teaspoon of cinnamon
1/2 teaspoon of nutmeg
1/2 pint jars (I like this size cause they are good for gift giving)
First core, peel, and chop apples into bite-sized pieces. Watch a tv show when you do this.
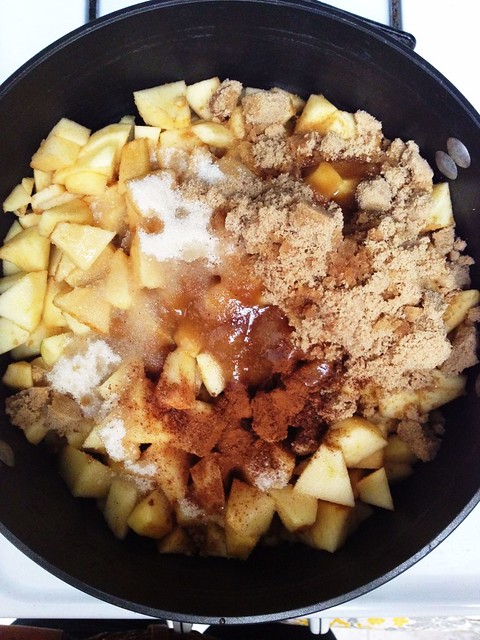
Now add all the apples, white sugar, brown sugar, cinnamon, nutmeg, and lemon into a heavy pot. Turn the heat up and make those apples sweat! Make sure you continuously stir so the apples don't burn on the bottom. The apple juices will start to appear at the bottom of the pot. Turn the heat down to low and let sit for 1 1/2 hour. Stir every now and then. Make sure you sanitize the jars if you are water bath canning. Place jars into pot and boil. Reserve some water in another bowl for the lids. Don't boil the lids or the wax will melt and will not make a good seal on the jar later on.
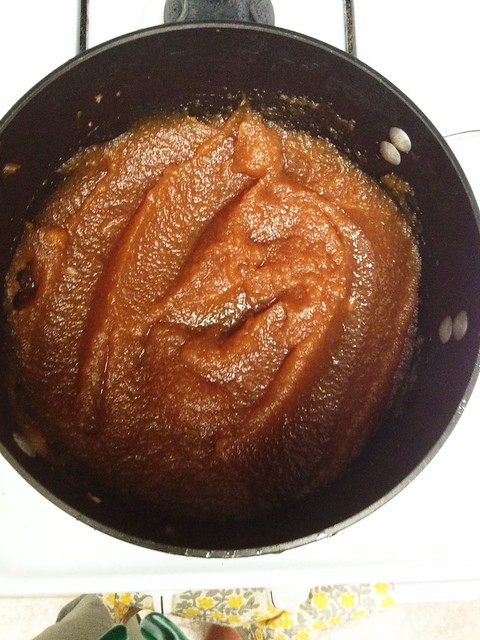
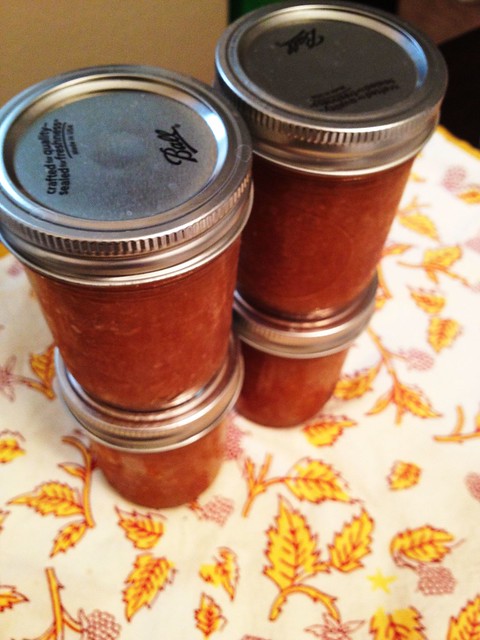
Pour the mushy sweaty apples into a blender and pulse until it meets your satisfaction. Pour the apple butter back into the same pot and cook until it is nice and thick (10-20 minutes). Now doesn't that picture look tasty? No? You are right.
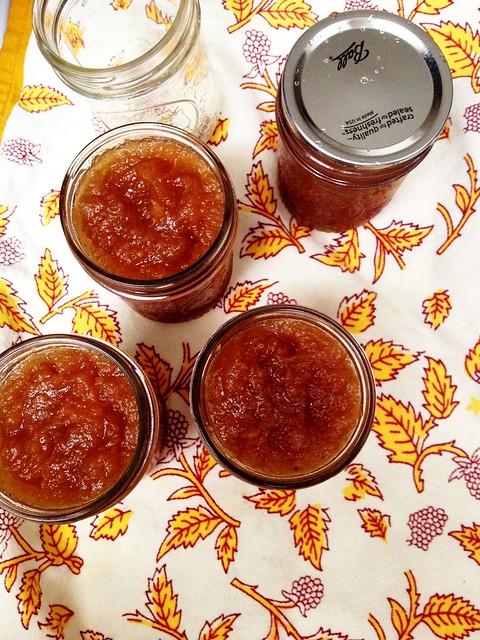
Use tongs to remove jars, ladle hot apple butter into jars, place lids and rings and process for at least 15 minutes. Remove from water bath and hear those beautiful pings! I can't say these are my most favorite jam photos I have taken but I need to find the good spots in our new home. Like a nice ledge to place a jar....hmmm.
Well, the next step is another butter. I would really like to try my hand at pear butter. Till next time, jam on!!!
Thursday, September 6, 2012
Havesting herbs! Heck yes!
Before we relocated to Cali I was prepping for a garden. I had built 2 raised wood beds and started seeds by the time we got the news. Needless to say you can't ship lumber and plants across the country. Boo!
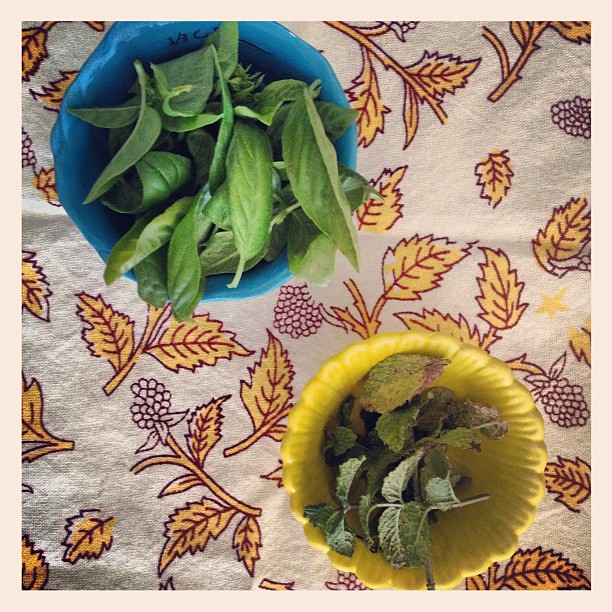
To make up for the lost garden this summer I bought some herbs to put on our patio. Right now we have Rosemary (I use this one a lot), Basil, Mint, and Lemon Balm (I haven't used this yet). I had cilantro and used it a few times before it bolted and started producing flowers.
I've been researching how to care for these plants and have the following tips for growing Basil:
1. Let the soil dry completely before watering again. The water should be able to drain quickly. My basil is planted in terracotta pots which I think wick moisture out of the soil.
2. Keep in a sunny area. My basil gets 8 hours of direct sunlight a day and it seems to like it.
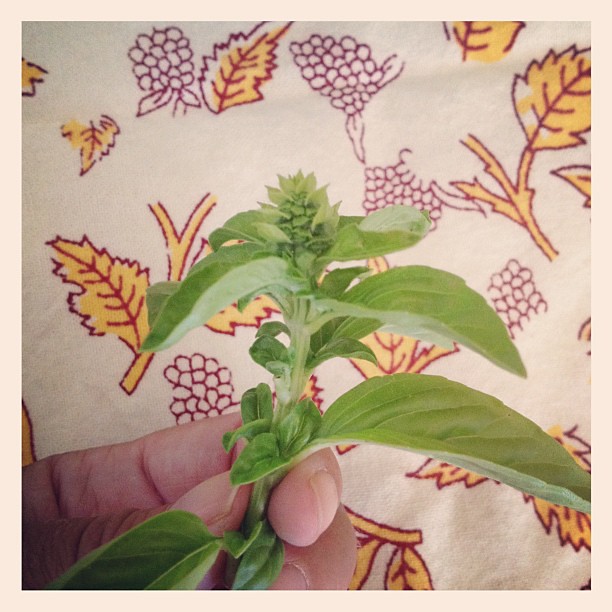
3. When you start to see the tiny leaves and flowers (like the above picture) appear cut them off.
4. To get basil to grow bushier you can cut from the first 3-5 sets of leaves and up off. Don't worry the basil won't die. I promise.
I love putting basil on sandwiches, it gives everything a nice subtle spicy, peppery taste. I have also been know to slice some up and throw it onto scrambles eggs for a "gourmet" touch!
To make up for the lost garden this summer I bought some herbs to put on our patio. Right now we have Rosemary (I use this one a lot), Basil, Mint, and Lemon Balm (I haven't used this yet). I had cilantro and used it a few times before it bolted and started producing flowers.
I've been researching how to care for these plants and have the following tips for growing Basil:
1. Let the soil dry completely before watering again. The water should be able to drain quickly. My basil is planted in terracotta pots which I think wick moisture out of the soil.
2. Keep in a sunny area. My basil gets 8 hours of direct sunlight a day and it seems to like it.
3. When you start to see the tiny leaves and flowers (like the above picture) appear cut them off.
4. To get basil to grow bushier you can cut from the first 3-5 sets of leaves and up off. Don't worry the basil won't die. I promise.
I love putting basil on sandwiches, it gives everything a nice subtle spicy, peppery taste. I have also been know to slice some up and throw it onto scrambles eggs for a "gourmet" touch!
Tuesday, August 28, 2012
California Hiking
So in an attempt to keep my blog current and up to date on my endeavors I give to you a post about hiking in California.
My husband and I have been making it a point to hike on the weekends. We live near Laguna Beach and typically hike in the Nature preserve near our home. I gives us time to be together, no screens. We talk, observe our surroundings, make jokes, and get sunburned. I have dreams of one day hiking all day and then camping at night and hiking back. It's the wanderlust of not knowing whats behind the next bend or whet kind of view you are gonna get once you reach the top of the mountain, it's that wanderlust, that keeps you walking. Yeeehaaaw!

My husband and I have been making it a point to hike on the weekends. We live near Laguna Beach and typically hike in the Nature preserve near our home. I gives us time to be together, no screens. We talk, observe our surroundings, make jokes, and get sunburned. I have dreams of one day hiking all day and then camping at night and hiking back. It's the wanderlust of not knowing whats behind the next bend or whet kind of view you are gonna get once you reach the top of the mountain, it's that wanderlust, that keeps you walking. Yeeehaaaw!

Sunday, August 12, 2012
Jamming at the Fair
Howdy Jamsters,
I have been thinking a lot about what to can next...and whilst pondering my next great creation I stumbled upon the jam entries at my local fair. Needless to say I was quite excited and began snapping pictures of the jams that sounded interesting.
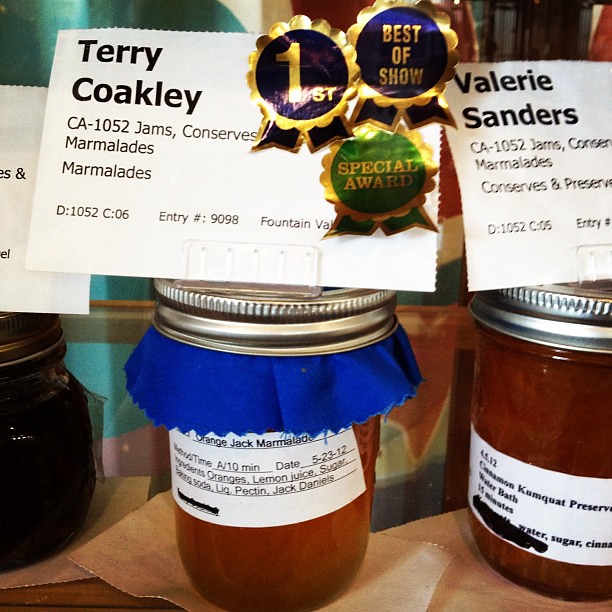
The best of show was a very interesting combination of Orange Marmalade and Jack Daniels. Woooweee, that would be a great way to get you day started! That would put a zip...or sway in my step!
It was so neat seeing all of these jamsters and inspired me to enter next year. As of now I would probably enter the carrot cake or monkey butter jams. The carrot cake it my favorite jam! As far as my next jamming expedition, it's soon! Everything is unpacked and the kitchen it put together, now...to find a new recipe...
I have been thinking a lot about what to can next...and whilst pondering my next great creation I stumbled upon the jam entries at my local fair. Needless to say I was quite excited and began snapping pictures of the jams that sounded interesting.
The best of show was a very interesting combination of Orange Marmalade and Jack Daniels. Woooweee, that would be a great way to get you day started! That would put a zip...or sway in my step!
It was so neat seeing all of these jamsters and inspired me to enter next year. As of now I would probably enter the carrot cake or monkey butter jams. The carrot cake it my favorite jam! As far as my next jamming expedition, it's soon! Everything is unpacked and the kitchen it put together, now...to find a new recipe...
Wednesday, June 27, 2012
So much can change in 1 month
Hi all,
I just wanted to let everyone know I haven't abandoned this blog but I am in a bit of a limbo right now. A little over a month ago my husband was laid off (he worked for 38 Studios, a huge game company in RI).
Since then there have been so many highs and lows but to get to the point I am sitting in a hotel room in Laguna Hills California. Within the past month I completed my first masters class, cleaned and reorganized the ceramics room I was teaching at and packed up our whole house to be shipped across the country. Whew. And this week I have been hiking the Laguna Hills Ridge and tanning, talk about going from 100 mph to 0!
So, all my canning stuff, including my 40+ jars of canned jams/jellies/pickles are traveling across the country as we speak. I don't think the packer was thrilled with boxing up so many...breakables. Anyways I am looking forward to getting settled in our new place and getting my mofo pot out! Till then, jam on!
Thursday, May 10, 2012
Bloggy love letter
Dear Bloggy,
I miss you so much and I really need to spend some time with you but I have been extra busy lately. Please forgive me as I have just started my Masters AND teaching high school ceramics. What about the weekends, you ask? Well, those have been fairly busy too.
Look, I am hankering for some apple butter, how about you? Yes? Okay so let's meet next week to make some smooth and sensual apple butter.
Miss and Love you lots!
K
Tuesday, April 17, 2012
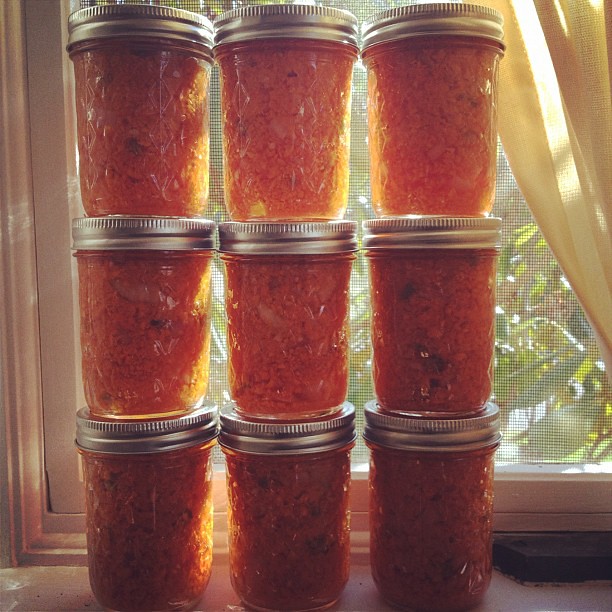
# 12 Carrot Jalapeno "Risky" Relish and was it worth the burning of my hands?
When I was a little girl I would always call jalapenos "jap-a-lan-o's". Yea, yea that is sooooo cute but I am pretty sure I was well into my teens before my mom corrected me. "Karly, it's 'Ha-lo-peen-no's' HA HA-lo-peen-no's." I like to imagine what it was like going food shopping with me when I was a little girl, it must have sounded something like this:
Me: Hey ma, how many of des here jap-a-lan-o's do you want? How come deem der people are talking dat funny lanwidge, ma? MA?
So FUN FACT EVERYONE! Jalapeno's burn the shiza out of your hands! If you are like me and think you have strong hands, you don't. Not when it comes to jalapenos and habaneros. IT. WILL. BURN. FOR. HOURS! At first it lightly burned and then it got sooo bad that I thought some lotion would help, nope. Hydrogen peroxide, nope. Milk, nope. As I sit here typing I still have a mild burning sensation on my fingers! So wear gloves!
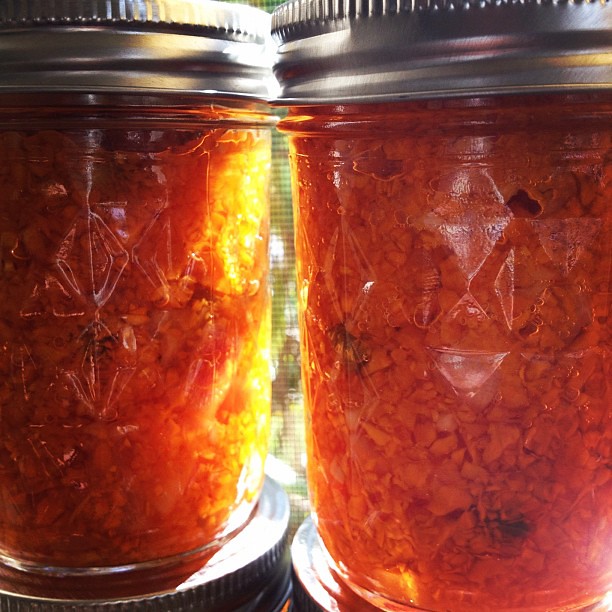
So after that...fiasco I was contemplating the risk verse the reward, that being the relish. So when my husband came home we sat down to delicious Kayem hotdogs and we hereby declared that the Carrot Jalapeno Relish was.....a success!!! My husband described the relish as "surprisingly delightful edition to a hot dog" and rightfully so! The relish is unique since the base is carrots, so it is slightly sweet and spicy. I could see this being added to potato salad, deviled eggs, or a grilled cheese sammie!
Recipe from Tart and Sweet
Alls you need:
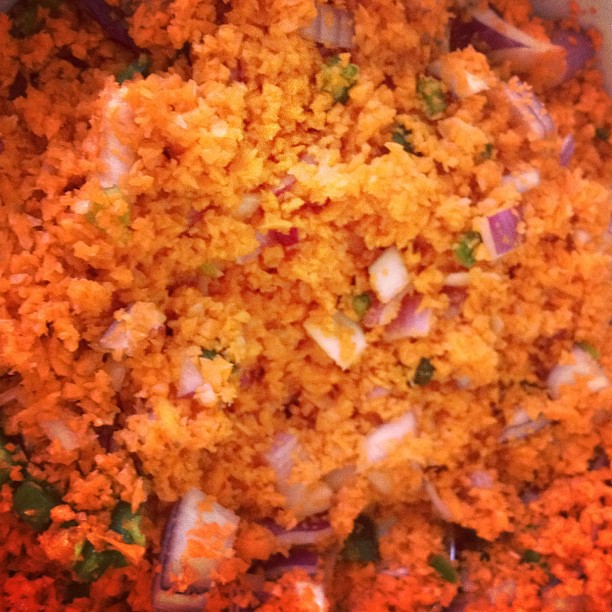
3 lbs of carrots, cut into coins and then pulverized in a blender
2 red onions diced
2 tbsp of minced garlic
5 jalapenos, seeds removed and thinly sliced
4 habaneros, seeds removed and thinly sliced
Brine:
4 cups of water
8 cups of apple cider vinegar (5% acidity)
1/4 cup brown sugar
2 bay leaves
Satchel:
1/2 cinnamon stick
1 tbsp mustard seed
1 tbsp coriander seed
1 tbsp ground black pepper
I know it looks like a lot but once the carrots are pulverized in a blender the recipe goes smoothly, added that you are wearing gloves while cutting the hot peppers.
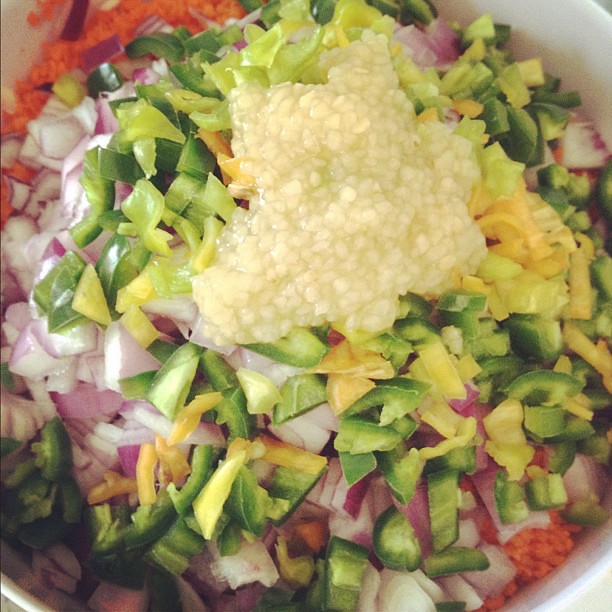
Combine carrots, hot peppers, onions, and garlic into a large bowl and mix so everything is evenly distributed.
Create a satchel from cheesecloth and add in the cinnamon stick, mustard seed, coriander seed, and ground black pepper.

In a big ole pot combine the water, vinegar, brown sugar, and bay leaves to create the brine. Add the satchel into the brine and bring to a boil.
Take your sanitized hot jars out of the canner and pack in the dry ingredients, this being the carrot/hot pepper mix. Shove everything down real good. Then ladle the boiling brine into the jars. Seal and process for 10 minutes or according to altitude.
Thursday, April 12, 2012
This weekend
Hi Jamsters,
I know, I know...I'm due for another jam session, but last week but I just started a new job teaching high school ceramics. Since moving to Rhode Island from Florida finding a art teacher job has proved difficult to say the least so I was ecstatic when I was offered the position.
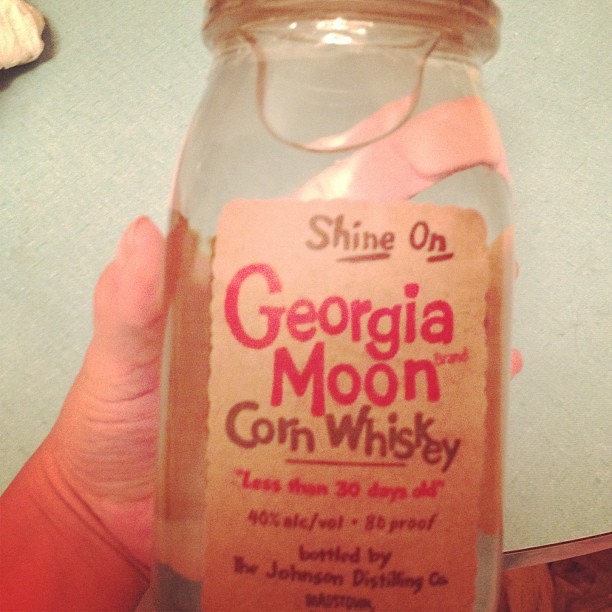
To make up for my lack of posts here is a picture of some "Georgia Moonshine" purchased from our local liquor store. It has a kind of "corny taste" but it's not bad and I enjoyed the unique jar packaging. New Jam post, this weekend!
I know, I know...I'm due for another jam session, but last week but I just started a new job teaching high school ceramics. Since moving to Rhode Island from Florida finding a art teacher job has proved difficult to say the least so I was ecstatic when I was offered the position.
To make up for my lack of posts here is a picture of some "Georgia Moonshine" purchased from our local liquor store. It has a kind of "corny taste" but it's not bad and I enjoyed the unique jar packaging. New Jam post, this weekend!
Sunday, April 1, 2012
Good stuff!
Hey Jamsters!
Have any of you heard of kickstarter? It's this fabulous website that allows you to "back" a specific project. I came across Homesweet Homegrown. These gals know whats up! I had to donate because this is something I believe in so deeply and I hope that our younger generation explores preservation methods and actually growing their own food!
Here is the link, check it out! Donate whatever you can afford to get this project going AND if you donate $20 you get a book with awesome illustrations and information about growing your own food, canning and pickling! It's a win win situation dudes!
Wednesday, March 28, 2012
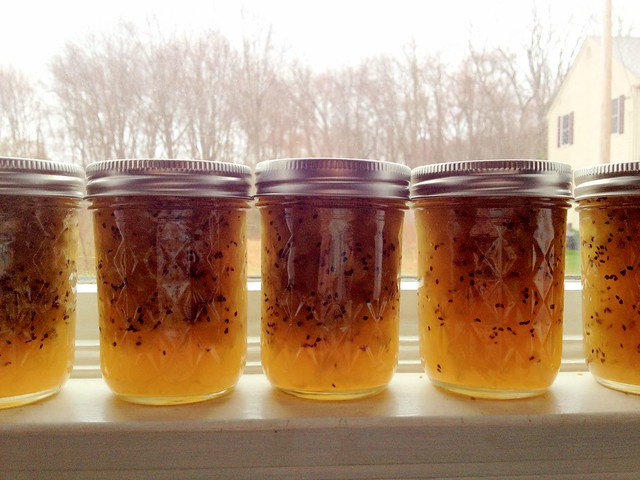
#11 Pineapple Kiwi Jam
Hey y'all Jamsters!

Ahhh, it's not quite summer time yet but it never hurts to pretend! With one lick of the scrumptious tropical delight you will be transported to kokomo, that's where I want to goooo! Now I'm not too sure when Kiwi's are in season but Trader Joes had a good deal on them and they smelled so good!
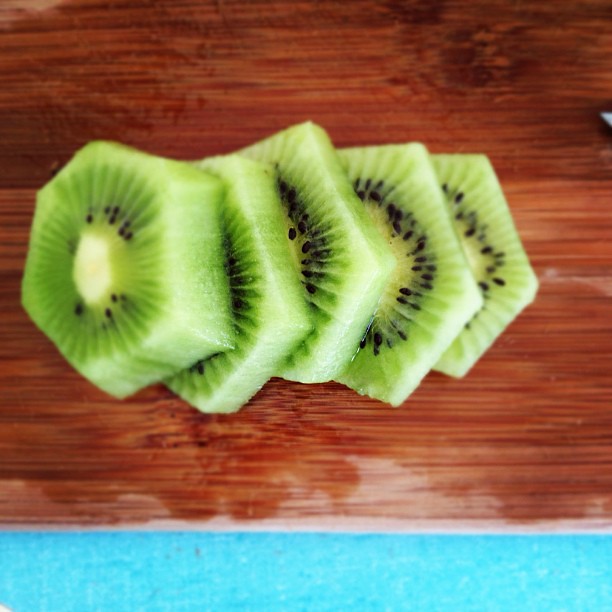
Kiwi's are so pretty! The contrast between the green and black seeds make them very fashionable and attractive.
Alls you need:
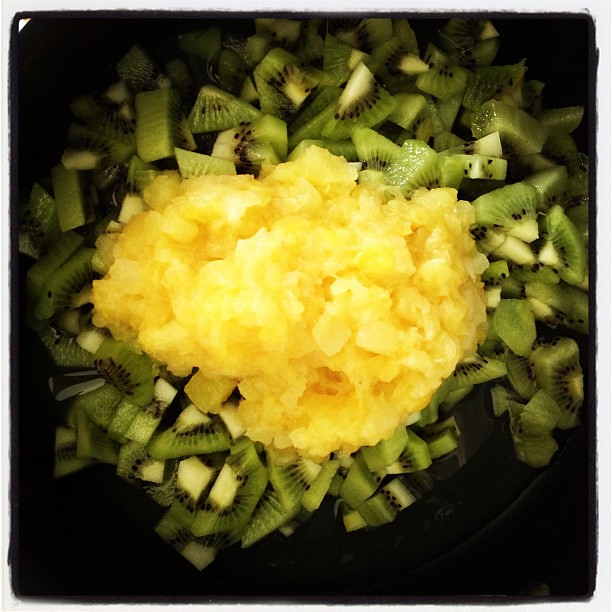
3 cups of chopped and peeled kiwi
1 1/2 cups of crushed pineapple
1/4 cup of water
4 TBS of dry pectin
3 cups of sugar
Remember to always have your jars sterilizing before you begin! AND it is never a bad idea to throw in an extra jar just in case your yield is a bit more then the recipe states. So place your jars into a canning pot or big mofo pot and cover with water and then bring water to a boil. Use some of this boiling water to pour over lids and rings.
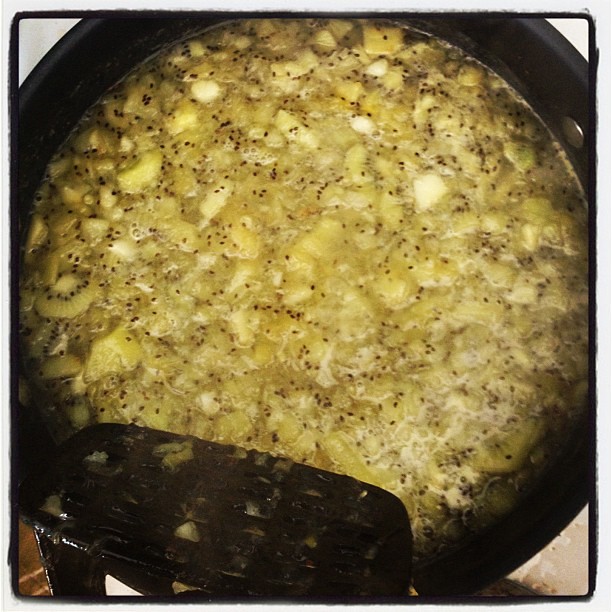
Combine the kiwi, crushed pineapple, and water into a big mofo pot. Bring to a boil stirring well or mashing with a potato masher/fork. Once boiling add the sugar. Stir well to combine and check the consistency using the cold spoon method. Once desired gelling point has been reached remove sterilized jars from water bath and use funnel to ladle the pineapple kiwi jam into the jars. Check for air bubbles and put a lid on it!
Process in boiling water bath for 10 minutes or according to your elevation.
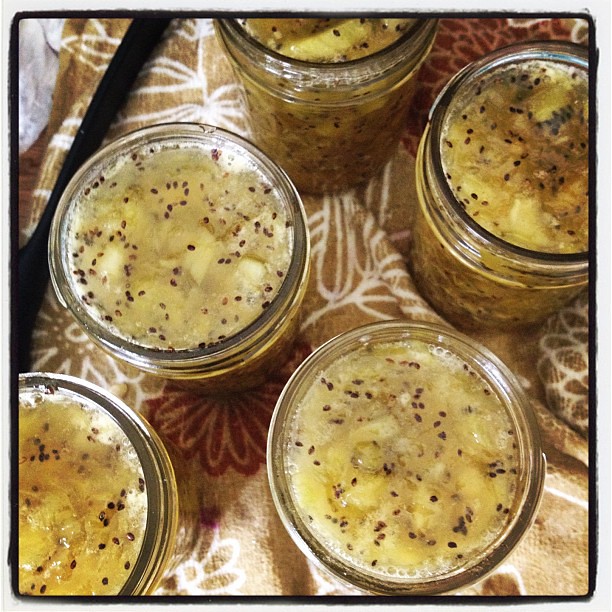 I have been experimenting with different photo applications on my iphone. Yes, I use my phone to photography everything. Why? I have a pretty old beat up digital camera that takes okay pictures but I really like that I can add funky filters on my iphone and I can automatically send them to my flicker account. I ALWAYS lose my camera cable when I have to upload pictures.
I have been using instagram which is really easy to use and a lot of fun. Recently I am trying out Camera! which is a bit more technical but with tons more filters.
Ahhh, it's not quite summer time yet but it never hurts to pretend! With one lick of the scrumptious tropical delight you will be transported to kokomo, that's where I want to goooo! Now I'm not too sure when Kiwi's are in season but Trader Joes had a good deal on them and they smelled so good!
Kiwi's are so pretty! The contrast between the green and black seeds make them very fashionable and attractive.
Alls you need:
3 cups of chopped and peeled kiwi
1 1/2 cups of crushed pineapple
1/4 cup of water
4 TBS of dry pectin
3 cups of sugar
Remember to always have your jars sterilizing before you begin! AND it is never a bad idea to throw in an extra jar just in case your yield is a bit more then the recipe states. So place your jars into a canning pot or big mofo pot and cover with water and then bring water to a boil. Use some of this boiling water to pour over lids and rings.
Combine the kiwi, crushed pineapple, and water into a big mofo pot. Bring to a boil stirring well or mashing with a potato masher/fork. Once boiling add the sugar. Stir well to combine and check the consistency using the cold spoon method. Once desired gelling point has been reached remove sterilized jars from water bath and use funnel to ladle the pineapple kiwi jam into the jars. Check for air bubbles and put a lid on it!
Process in boiling water bath for 10 minutes or according to your elevation.
I have been using instagram which is really easy to use and a lot of fun. Recently I am trying out Camera! which is a bit more technical but with tons more filters.
Tuesday, March 27, 2012
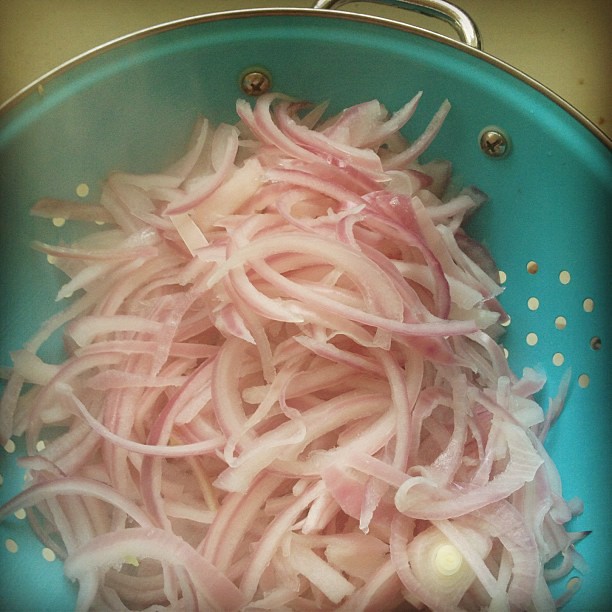
#9 Pickled Red Onions

More and more I am thinking about canning things I see myself using a lot. These pickled red onions are a great addition to your collection of canned goods because of it versatility. Plop it on pulled pork, stir into tomato soup, or **gasp** slather it onto a grilled cheese sammie.
Having things like pickled red onions on hand really lets you create unique ("made in Sweden") combinations.
This recipe comes from Food in Jars, one of the best canning blogs I have found! She just released her first book too, which I am totally buying!
Alls you need:
3lbs of red onions (about 4 medium sized) slice thinly
2 cups of apple cider vinegar
1/2 cup water (I used the water I boiled the onions in to get a pinker color)
3/4 cup of sugar
1 TBS of pickling salt (I believe you can sub regular salt as well)
2 TSP of mustard seed
1/2 TSP red chili flakes
Remember to always have your jars sterilizing before you begin! So place your jars into a canning pot or big mofo pot and cover with water and then bring water to a boil. Use some of this boiling water to pour over lids and rings.
Begin by slicing up your red onions very thinly, I spent about an hour sobbing over the onions, my eyes are very sensitive. Then bring a mofo pot of water to a boil and dump in those onions, boil hard for about 4-5 minutes.
Then drain onions through a colander and reserve 1/2 cup of the water. Pour the water, apple cider vinegar, sugar, pickling salt, mustard seed and red chili flakes back into the same pot and stir until everything dissolves. Dump the onions into this mixture called a brine and remove from heat. It should look something like the image below.

Now take your jars and use a funnel to ladle in the onions and brine leaving 1/2 inch headspace and packing onions down into the brine. Once packed and lids/ring one place back into the hot water bath and boil for 10 minutes.

So had to taste test and all I have to say is "ohhhh yeeaaa" and I just ate some on a cracker! Very nice combination of sweetness and tartness and I think this would be good paired with different types of cheeses too. The bright pink color is lovely too! If y'all have any questions/comments about canning feel free to comment below and I will answer, I promise! Do you have a favorite thing that you have canned? A special recipe?
Thursday, March 22, 2012
Real or fake?

On my way home from Trader Joe's I passed by what appeared to be a REAL horse at an antique shop. I had to stop, turns out it was FAKE, but it was so convincing.

The place had all this Barbie stuff outside too, so I had to take a peak. Lots of cool kick-knacks and postcards.
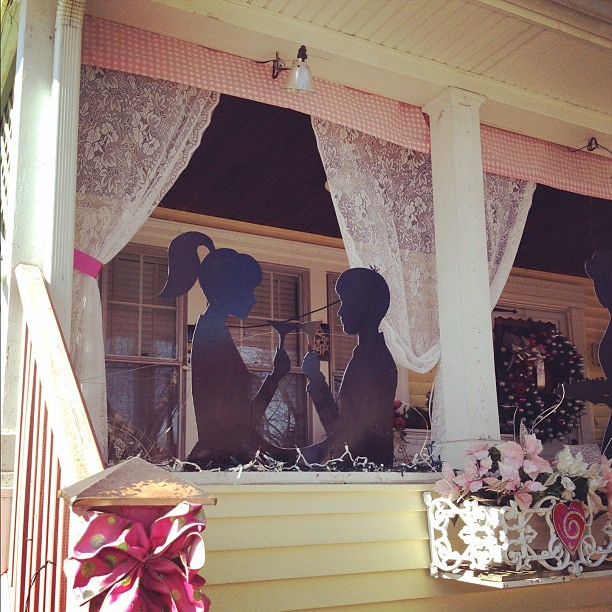
It pays to take the long way home sometimes:-) I challenge everyone to pick one day next week and take a turn down a street you've never been, you never know what you will find! I PROMISE I will post a jam this weekend! See I've been really busy trying to put a garden together and I am super excited about the prospect of fresh basil/cilantro/chives/tomatoes/cukes/ect, ect.
Wednesday, March 21, 2012
Making your preserves work for you!
Hi Jamsters!
I know I am due for another jamming session, and that will most likely be done tomorrow, but today I would like the share a unique way you can incorporate your jams/jellies/marms into something more then just slathering it on toast.
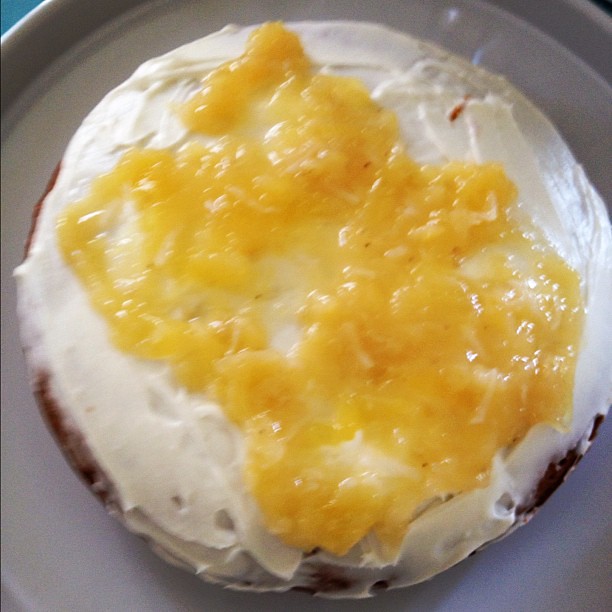
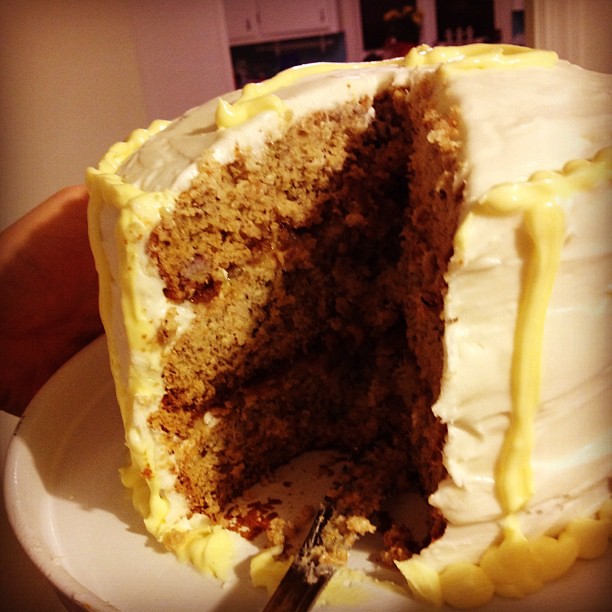
I present to you Banana Dream Cake. Inside this delicious 3 layer cake is a filling of Monkey Butter and frosting. If you recall Monkey Butter is the delicious combination of banana butter, pineapple, and coconut. You can find that recipe here.
The recipe for the 3 layer cake came from The Novice Chef and it is truly close your eyes and mumble to yourself good. Check out her blog, it is fantastic! I am going to include the recipe below for yall!
Alls you need:
Cake Part:
3/4 cup butter
2 cups granulated sugar
3 eggs
2 teaspoons vanilla extract
3 cups all-purpose flour
1 1/2 teaspoons baking soda
1/4 teaspoon salt
1 cup milk
1/2 cup sour cream
4 oz applesauce
Juice from 1 lemon
1 cup mashed over ripe bananas (I used 3 small bananas)
Frosting Part:
3/4 cup butter, softened
1 1/2 (12 ounce) package cream cheese, softened
5 3/4 cups confectioners’ sugar
2 teaspoons vanilla extract
Filling:
Monkey Butter or any other jam.
First you want to mix the dry ingredients together (flour, baking soda, salt) in a large bowl. Next you want to smash the bananas really good and squeeze the lemon juice onto them in a separate bowl. Then cream together the sugar and butter until nice and fluffy. Then add the eggs in 1 at a time. Add vanilla extract, sour cream, and applesauce into mixture. Now beat in flour and milk alternating between the two. Lastly add in the smashed bananas. Make sure everything is well incorporated (meaning skim the sides of the bowl in case the butter/sugar didn't mix together). Pour the batter into 3 8 inch round pans that were greased and floured.
Put into 275 degree oven for about 40-50 minutes until no mushy stuff comes out on a toothpick. One done baking put directly into freezer and freeze for about an hour.
While cake rounds are freezing whip up that frosting but creaming the butter and cream cheese together. Add a little vanilla extract. Then start adding the confectioners sugar little by little. I know it seems like a lot of sugar and frosting but this is a big cake and remember...you are not going to eat the whole cake yourself!
Lastly, to assemble the cake place bottom round onto a cake plate with a dollop of frosting beneath it to keep it in place. Then layer frosting, Monkey Butter, cake, frosting, Monkey Butter, cake, frosting. Do a crumb layer around the whole cake, stick in the freezer again and do the final frosting!

Ta-da! You can see the Monkey Butter oozing out! I actually made this for my husband and I's anniversary, he really loves Banana cake so I wanted to surprise him and since there was so much I sent him to work with some to share:-) Well that's that for now and hopefully I'll be jamming tomorrow!

I know I am due for another jamming session, and that will most likely be done tomorrow, but today I would like the share a unique way you can incorporate your jams/jellies/marms into something more then just slathering it on toast.
I present to you Banana Dream Cake. Inside this delicious 3 layer cake is a filling of Monkey Butter and frosting. If you recall Monkey Butter is the delicious combination of banana butter, pineapple, and coconut. You can find that recipe here.
The recipe for the 3 layer cake came from The Novice Chef and it is truly close your eyes and mumble to yourself good. Check out her blog, it is fantastic! I am going to include the recipe below for yall!
Alls you need:
Cake Part:
3/4 cup butter
2 cups granulated sugar
3 eggs
2 teaspoons vanilla extract
3 cups all-purpose flour
1 1/2 teaspoons baking soda
1/4 teaspoon salt
1 cup milk
1/2 cup sour cream
4 oz applesauce
Juice from 1 lemon
1 cup mashed over ripe bananas (I used 3 small bananas)
Frosting Part:
3/4 cup butter, softened
1 1/2 (12 ounce) package cream cheese, softened
5 3/4 cups confectioners’ sugar
2 teaspoons vanilla extract
Filling:
Monkey Butter or any other jam.
First you want to mix the dry ingredients together (flour, baking soda, salt) in a large bowl. Next you want to smash the bananas really good and squeeze the lemon juice onto them in a separate bowl. Then cream together the sugar and butter until nice and fluffy. Then add the eggs in 1 at a time. Add vanilla extract, sour cream, and applesauce into mixture. Now beat in flour and milk alternating between the two. Lastly add in the smashed bananas. Make sure everything is well incorporated (meaning skim the sides of the bowl in case the butter/sugar didn't mix together). Pour the batter into 3 8 inch round pans that were greased and floured.
Put into 275 degree oven for about 40-50 minutes until no mushy stuff comes out on a toothpick. One done baking put directly into freezer and freeze for about an hour.
While cake rounds are freezing whip up that frosting but creaming the butter and cream cheese together. Add a little vanilla extract. Then start adding the confectioners sugar little by little. I know it seems like a lot of sugar and frosting but this is a big cake and remember...you are not going to eat the whole cake yourself!
Lastly, to assemble the cake place bottom round onto a cake plate with a dollop of frosting beneath it to keep it in place. Then layer frosting, Monkey Butter, cake, frosting, Monkey Butter, cake, frosting. Do a crumb layer around the whole cake, stick in the freezer again and do the final frosting!
Ta-da! You can see the Monkey Butter oozing out! I actually made this for my husband and I's anniversary, he really loves Banana cake so I wanted to surprise him and since there was so much I sent him to work with some to share:-) Well that's that for now and hopefully I'll be jamming tomorrow!
Wednesday, March 14, 2012
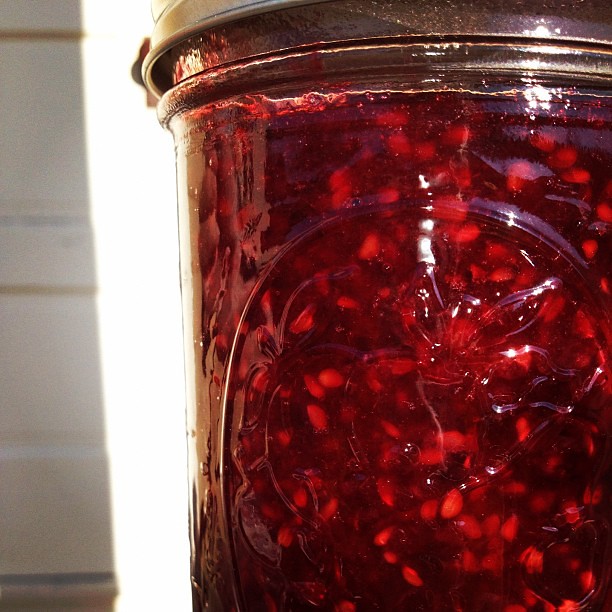
#8 Blackberry Lemon Jam
Hey y'all Jamsters!
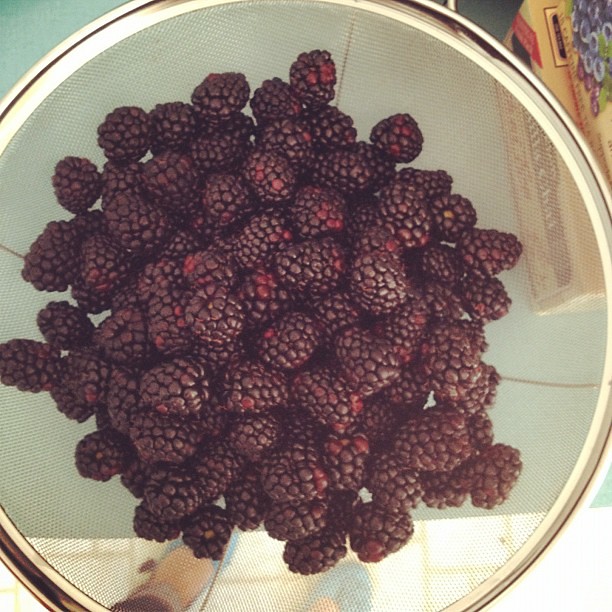
Hoping everyone is having a fabulous week! I decided to experiment this week with blackberries, unfortunately I can't go outback and pick my own so I decided to can what was on sale at my supermarket. I would love to learn a bit about foraging in this area, I think I found fiddle-heads on a nearby trail but am too scared to test them (remember the way Into the Wild ended?)
I got this book for Christmas from my Mom and I love it! It is so thorough and really goes in depth about the processes. Are there any canning books that y'all enjoy?
Alls you need:
8 cups of blackberries
3 Granny smith apples (cored) or pectin
2 cups of sugar
2 lemons (3 Tablespoons of juice and zest)
First wash your blackberries thoroughly and inspect. Now dump all of the berries and sugar into a mofo pot and make em sweat! Bring the pot to a medium simmer and let all the juices run out of the berries until there was enough juice to cover them. Make sure you stir often, don't want any burnt berries!

Now get out a strainer and place over a large bowl. Dump the whole pot into the strainer and mash with a spoon. Take the liquid from the bowl and put back into pot along with apple cores. Bring this to a simmer for about 20 minutes. Now remove the cores and dump whatever is left in the strainer and bowl back into the pot along with the lemon juice and zest.
Bring everything to a boil (the juice/berry pulp/lemon juice/zest) and begin testing for doneness using the cold spoon method. I wasn't getting a good gel so I added additional sugar free pectin and that helped thicken it up. Has anyone ever noticed a sheen on the jam after adding pectin? I wonder why this happens.
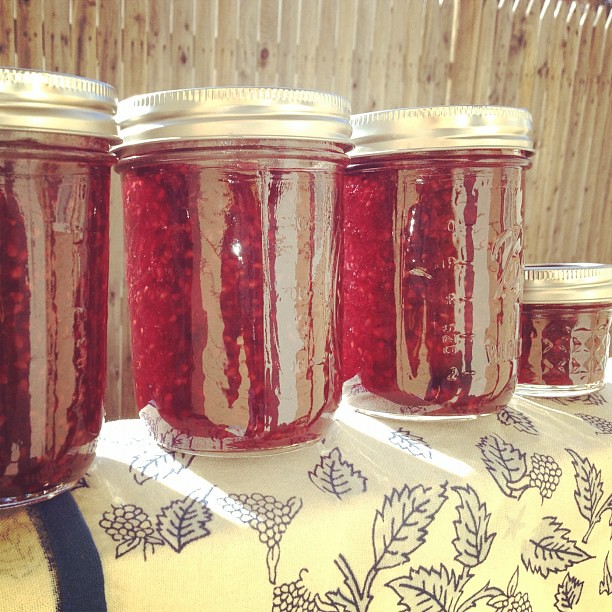
Ladle while piping hot into sterilized jars making sure to keep rims clean and air bubbles out. Process for 5 minutes (or according to your elevation) in a boiling water bath.
The purpose of the apple cores is to add natural pectin instead of the powdered stuff. Unfortunately I think I should have added the apple skin too because my jam wouldn't set so I ended up using the powered stuff anyways, No big deal. If you wanted to forgo the whole adding apple cores/peeling and just adding pectin I think that would be fine.
Hoping everyone is having a fabulous week! I decided to experiment this week with blackberries, unfortunately I can't go outback and pick my own so I decided to can what was on sale at my supermarket. I would love to learn a bit about foraging in this area, I think I found fiddle-heads on a nearby trail but am too scared to test them (remember the way Into the Wild ended?)
I got this book for Christmas from my Mom and I love it! It is so thorough and really goes in depth about the processes. Are there any canning books that y'all enjoy?

Alls you need:
8 cups of blackberries
3 Granny smith apples (cored) or pectin
2 cups of sugar
2 lemons (3 Tablespoons of juice and zest)
First wash your blackberries thoroughly and inspect. Now dump all of the berries and sugar into a mofo pot and make em sweat! Bring the pot to a medium simmer and let all the juices run out of the berries until there was enough juice to cover them. Make sure you stir often, don't want any burnt berries!
Now get out a strainer and place over a large bowl. Dump the whole pot into the strainer and mash with a spoon. Take the liquid from the bowl and put back into pot along with apple cores. Bring this to a simmer for about 20 minutes. Now remove the cores and dump whatever is left in the strainer and bowl back into the pot along with the lemon juice and zest.
Bring everything to a boil (the juice/berry pulp/lemon juice/zest) and begin testing for doneness using the cold spoon method. I wasn't getting a good gel so I added additional sugar free pectin and that helped thicken it up. Has anyone ever noticed a sheen on the jam after adding pectin? I wonder why this happens.
Ladle while piping hot into sterilized jars making sure to keep rims clean and air bubbles out. Process for 5 minutes (or according to your elevation) in a boiling water bath.
The purpose of the apple cores is to add natural pectin instead of the powdered stuff. Unfortunately I think I should have added the apple skin too because my jam wouldn't set so I ended up using the powered stuff anyways, No big deal. If you wanted to forgo the whole adding apple cores/peeling and just adding pectin I think that would be fine.
I was actually able to finish before it got dark out, thank you time change! I thought this jam would photograph beautifully in natural sunlight and it did. Oh and I had it on a pb sandwich and it was deeeelish!
One last thing, your kitchen WILL look like a murder scene when you are done There was globs of red all over the counters on on the towels, just so you know.
Tuesday, March 13, 2012
Stool Redo
Hi Jamsters,
Just wanted to let you know I haven't forgotten about yall. I know you were crying in the corner thinking "when is she gonna come back?" Anywho I just wanted to let ya know that tomorrow I will be doing 2 jams to make up for lost time.
Tonight I wanted to share with you my little weekend project, reupholstering a little stool I found tossed to the street a few months ago. Here it is before, all crummy and icky:
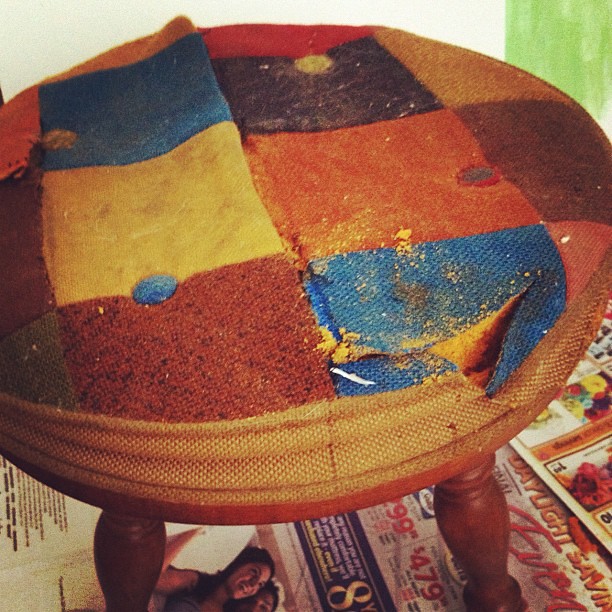
To be honest I liked the patchwork fabric but it was just in really bad condition. So I ripped it all off and the foam (the foam was sooo bad) and beneath it I found 6 pennies and a Canadian coin, someone had stored their life savings inside this stool!!! I disassembled the stool and replaced the foam and TADAAAA!
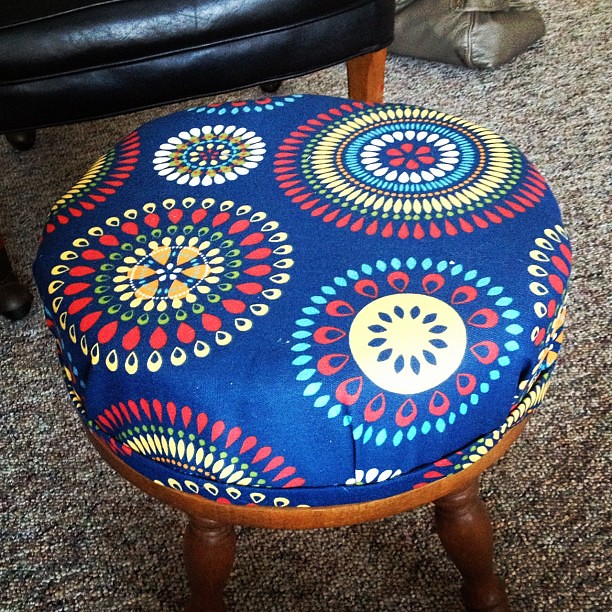
It took about 4 hours but was worth it. I also added a welt around the bottom to cover the staples. I'd like to learn more about reupholstering it is such an easy way to change the look of something.
One last thing, on Saturday I was browsing craigslist and came across a garage sale that had this super cool black "leather" chair for sale. It was nearby and I decided to see if it was still there. The conversation with the seller went something like this:
Me: "I see you have a black leather chair for sale, how much?"
Seller: "It is $40 dollars"
Me: "okaaaay" **ferociously texts husband to see if I can get it and receives text saying I can for $30 dollars**
Me: "Mister, I really like that chair you got there but my husband says I can't have it unless it is $30 dollars, could you do that for me?" **shuffles dirt around beneath my feet**
Seller: "Yea I guess so"

Woohoo! Lucie even approves of the new chair:-)
So tomorrow 2 jams! Later jamsters!
Just wanted to let you know I haven't forgotten about yall. I know you were crying in the corner thinking "when is she gonna come back?" Anywho I just wanted to let ya know that tomorrow I will be doing 2 jams to make up for lost time.
Tonight I wanted to share with you my little weekend project, reupholstering a little stool I found tossed to the street a few months ago. Here it is before, all crummy and icky:
To be honest I liked the patchwork fabric but it was just in really bad condition. So I ripped it all off and the foam (the foam was sooo bad) and beneath it I found 6 pennies and a Canadian coin, someone had stored their life savings inside this stool!!! I disassembled the stool and replaced the foam and TADAAAA!
It took about 4 hours but was worth it. I also added a welt around the bottom to cover the staples. I'd like to learn more about reupholstering it is such an easy way to change the look of something.
One last thing, on Saturday I was browsing craigslist and came across a garage sale that had this super cool black "leather" chair for sale. It was nearby and I decided to see if it was still there. The conversation with the seller went something like this:
Me: "I see you have a black leather chair for sale, how much?"
Seller: "It is $40 dollars"
Me: "okaaaay" **ferociously texts husband to see if I can get it and receives text saying I can for $30 dollars**
Me: "Mister, I really like that chair you got there but my husband says I can't have it unless it is $30 dollars, could you do that for me?" **shuffles dirt around beneath my feet**
Seller: "Yea I guess so"
Woohoo! Lucie even approves of the new chair:-)
So tomorrow 2 jams! Later jamsters!
Tuesday, March 6, 2012
#7 This S*** is Bananas!
So Newport was quite delightful although overcast. We learned about all sorts of mushy marriage stuff. On Saturday we made our way with a few friends down to the Newport Old Stone Mill. I've been curious about this mill ever since I read about it in a history book. Supposedly they thought vikings had built it and that it was proof that the vikings inhabited America before Columbus and his peeps. One of the downfalls was there were no plaques/information about the mill nearby so a friend recited wikipedia's blub in his best tour guide voice.
Next we headed to Bruskers Irish Pub, a small place with a good beer selection and quite possibly the friggin best Reuben I've ever had. The Corned Beef was sooo thick and juicy. I indulged in Magners Cider, I love how cider tastes like the champagne of beers, so fizzy and light!
One of the coolest places we went was the Newport Brewery. They are known for the Newport Storm Beers, we decided to do a taste test and walk around a bit. I liked their Blueberry Beer and the other light one...I just can't handle the ale's they make me feel super full and bogged down. We got to see where they ferment the beers and bottle em, very neato.
Enough about me, let's talk about the Jam this week!
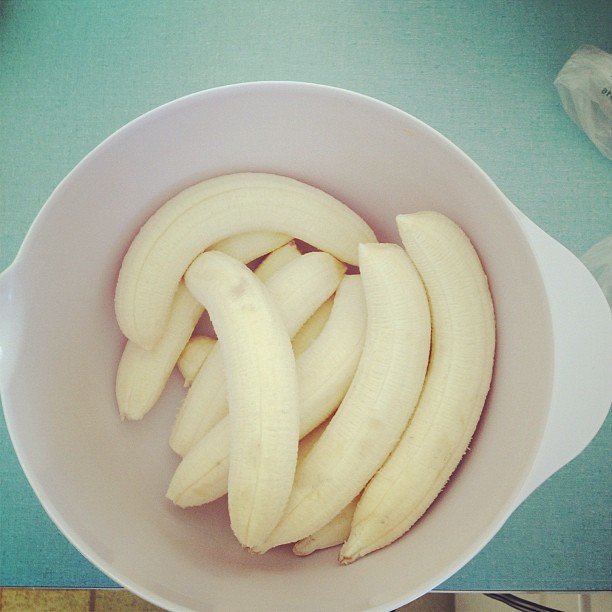
I'm going Ape for Banana's and I am hoping to use it in a much larger treat for my hubby (I'm supposed to do nice things for him now). Remember to follow directions closely because banana's are relatively low in acid.
Alls you need:
Adapted from Learn to Preserve
10 Bananas medium sized ripe
4 cups of pineapple diced or chunked (or 2 20oz cans)
1/2 cup of coconut
5 cups of sugar
3 fresh lemons juiced
6-7 pints of jars
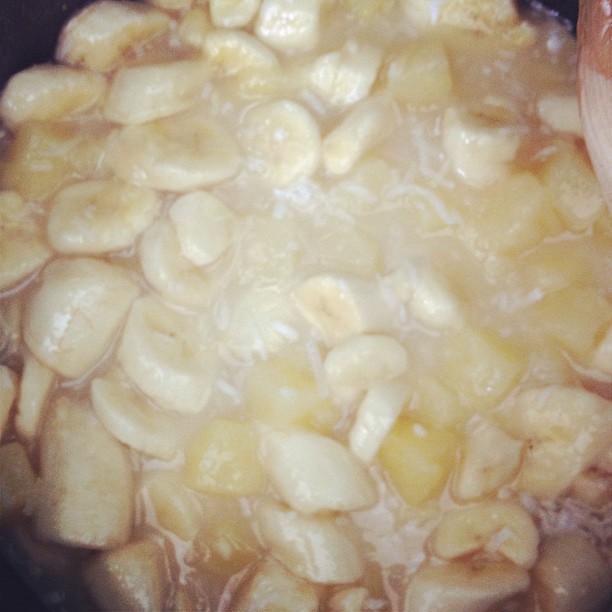
First you are going to slice up those bananas to make it easier to mush em up while cooking. Then add all ingredients into a big mofo pot. Stir well until everything comes to a boil. Once boiling reduced to a simmer and start mashing everything up with a potato masher or big spoon.

Now remove your sterilized jars from the canning pot and ladle in the deliciousness called monkey butter. Process in a boiling water bath for 15 min or according to your elevation.

The verdict: outstanding! The bananas give a nice creamy consistency once mashed up and I love the bit of coconut. A very tropical summery jam! I can't wait to put this on oatmeal/pancakes/smoothies/ice cream/peanut butter sammies, woohoo!
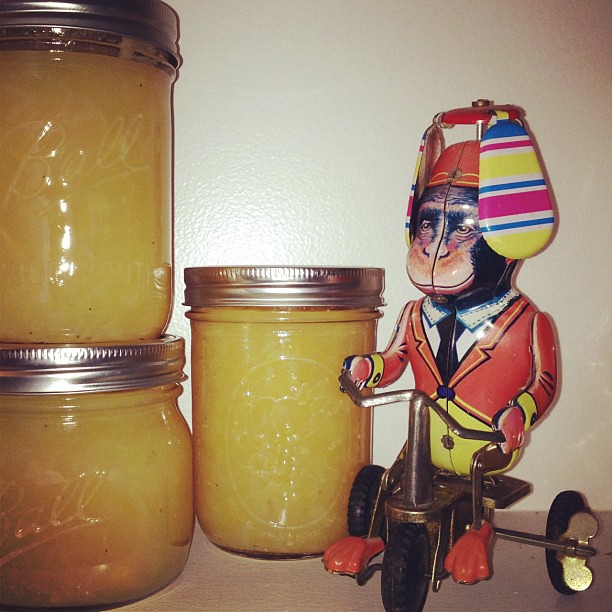
I had to put it next to my tin toy monkey. I have a small collection going of tin toys, they have a super interesting history! Okay, now you know I'm a dork if you couldn't tell already.
Thursday, March 1, 2012
Newport and Taste Test
This weekend my husband and I will be doing a "marriage retreat" in Newport and I am really excited! The main reason we are going is because it is FREE and we get to stay at this fancy hotel, it's sponsored by the company my husband works for.
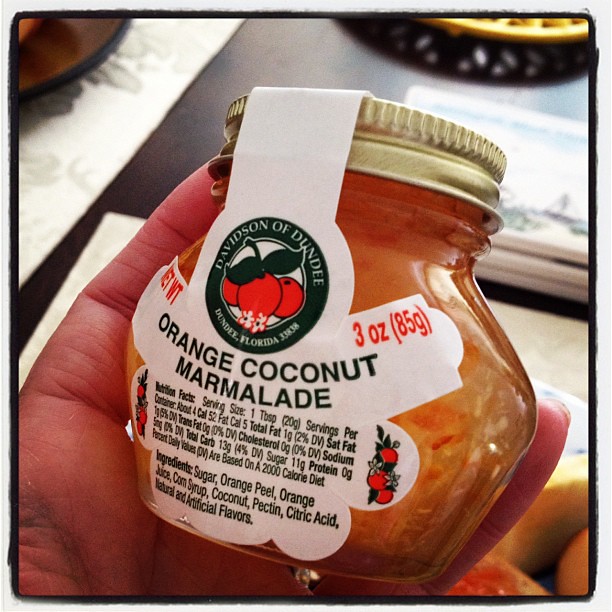
So I wanted to let yall know how the jam tasted from Florida. The first I tried was a Orange Coconut Marmalade. It was sweet but had a wonderful orange undertones to it. Not very bitter, which I found sad cause I do enjoy things with a bite to them. But it was very good! Now I need to get to trying the rest of them!

Saturday, February 25, 2012
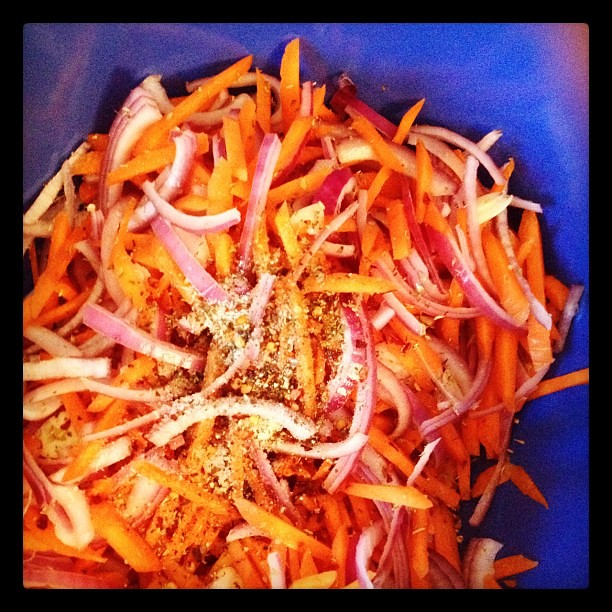
#6 Carrot and Onion Slaw and It's this special thing they do in Sweden
Let me begin by saying this is a delightful addition to anyone's kitchen because it is so versatile.You can eat it on a burger, a potato, on salad, on sandwiches, in tacos, on EGGS! This would be amazing atop an egg sandwich, Mmmm, creamy egg yolk and vinegar...yes, yes my pretty.
Does anyone ever feel like a weirdo when they introduce someone to one of their concoctions? For instance, the thought of eating this slaw atop an egg makes me all gooey inside however if I told anyone this I feel like they would balk and refuse my delicacy.
So I devised a plan to prevent these awkward occurrences. Anytime someone questions your, ahem, unique palette just say, "It's this special thing they do in Sweden". That's it! I have created an example below.
Me: Dude, wanna try these super yummy egg sandwiches I made?
Sister: What is that stuff? **Points to slaw**
Me: Oh that? it's this special thing they do in Sweden.
Sister: In Sweden? Well then it must be cool.
Me: YEA! **squints eyes and points a fork towards sister** You'll eat it and you'll like it!
All right let's get down to the nitty gritty. This type of preservation method is called a dry pack. Meaning you pack everything into the jars with no liquid at first. Once packed you dump boiling vinegar over everything.
Carrot and Onion Slaw adapted from Put a Lid on it.
Alls you need:
4 cups matchstick carrots, chop em up as best you can
2 cups julienne red onion
3 cloves thinly sliced garlic
1 Tablespoons dried oregano
1 Tablespoons dried basil
1 Tablespoons fine salt
1 Teaspoon black pepper
1/2 Teaspoon. red pepper flakes
16 oz. white wine vinegar
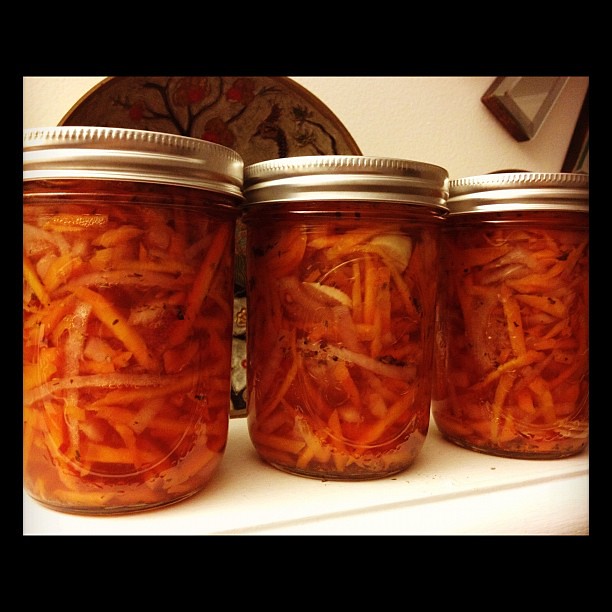
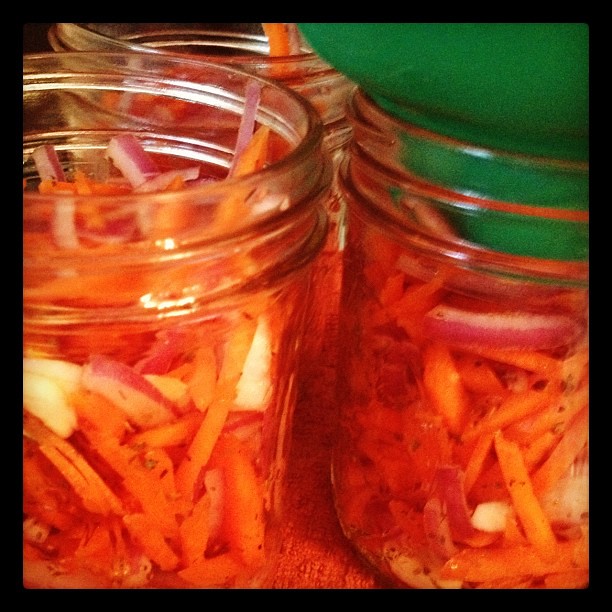
First you have to chop everything up and dump it in a big bowl (expect the vinegar, silly). Then you gotta put all the spices in the bowl. Make sure you have your jars sanitizing while you do this.
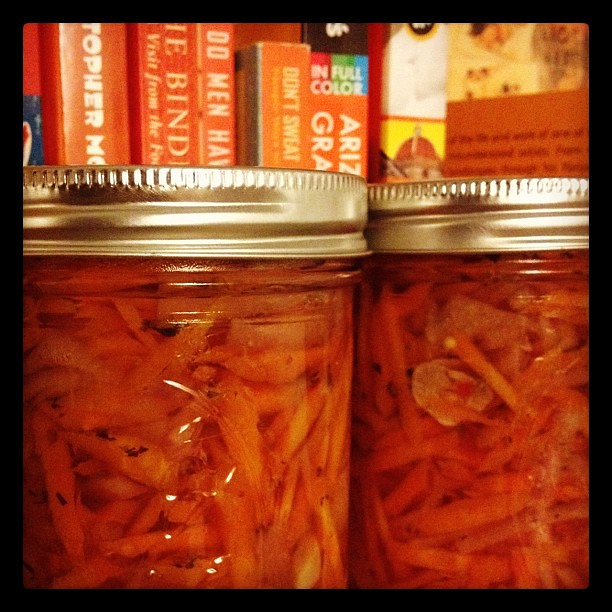
Then you are gonna heat up that white wine vinegar until its boiling. Meanwhile pack your jars with the carrot/onion mixture. Dump the vinegar into the jars and then process according to your altitude. For me 10 minutes.
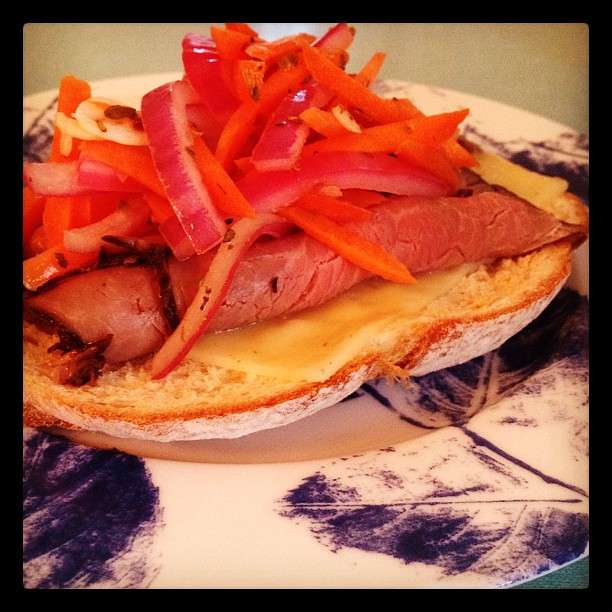
Now think of all the weird mofo stuff you can put this on! I could not wait so I put some of the extra slaw on an open sammie with roast beef. Yea Baby! And the thing I love most? It's canned so it'll last months, maybe years? outside the fridge (until opened)!
Subscribe to:
Comments (Atom)